
Building Walter the Warthog, our Delica L400
/After hemming and hawing for a while, I've decided to start a build thread to document the build out of the van. Here's a quick history of our so far 14-month ownership of Walter the Walrus/Warthog. If you need a few paragraphs on the decision making process that brought us to paying really good money for a 25 year old JDM minivan, please look here. My goal is to make a few posts over the next few days to catch up on all the work we've done so far, and then start documenting in real time.

A family photo as we took delivery of Wlater from Nomadic Van of Sun Valley.
Walter was pretty well bone-stock when we bought him from Nomadic Van of Sun Valley ID, other than a two inch (50mm?) lift installed by Coombs Country Autos and a triple gauge pod installed by the guys at Nomadic Van. We drove him like this for most of last summer (2022), and our preferred daily-driver setup was to have the middle row captain's seats faced forward, and the third row seats folded up and clasped to the grab handles. This allowed the front half of the vehicle to act like a passenger vehicle and the back half of the LWB to carry some real cargo, or allow a platform for afternoon beverages while riverside. A veritable vehicular mullet, if you will.

Test fitting one standard sized Tuttle.
The first step of any great adventure is daydreaming, creating "a fantasy, an absurd chimera" as per my travel mentor Pablo Rey, and that step lasted us until March 3rd, 2023. Out first addition was a roof rack, because we needed space for a solar panel, a small roof box, and some accessories to prove to everyone in the Walmart parking lot that we are real overlanders. We ended up paying the big bucks for a product from Rhino Rack, as it was specifically fitted to our LWB high roof L400, and balanced our desires for low profile and stalwart construction. The fitting of the rack only took a few hours of fun-in-the-sun-in-the-snow, and we were pretty happy with the platform it provided us to begin looking for roof-top accessories.
Our next addition was a side ladder from XplorMor Offroad. The ladder required two holes to be drilled in the rocker panel of the van, but other than that it was a bolt-on accessory. Installing it felt like we were just adding jewelry to the van because there was nothing on the roof rack that would require ladder access, so we lovingly (and temporarily) named it the Ladder-To-Nowhere. The eventual plan was to add a roof box, and while we were pretty sure we wanted to go with a Yakima Topwater box, we just weren’t sure yet. In the mean time, we found a sweet deal on a used Ironman4x4 Awning. The product we chose is a 270º free-standing awning that sets up and breaks down in about 30 seconds.
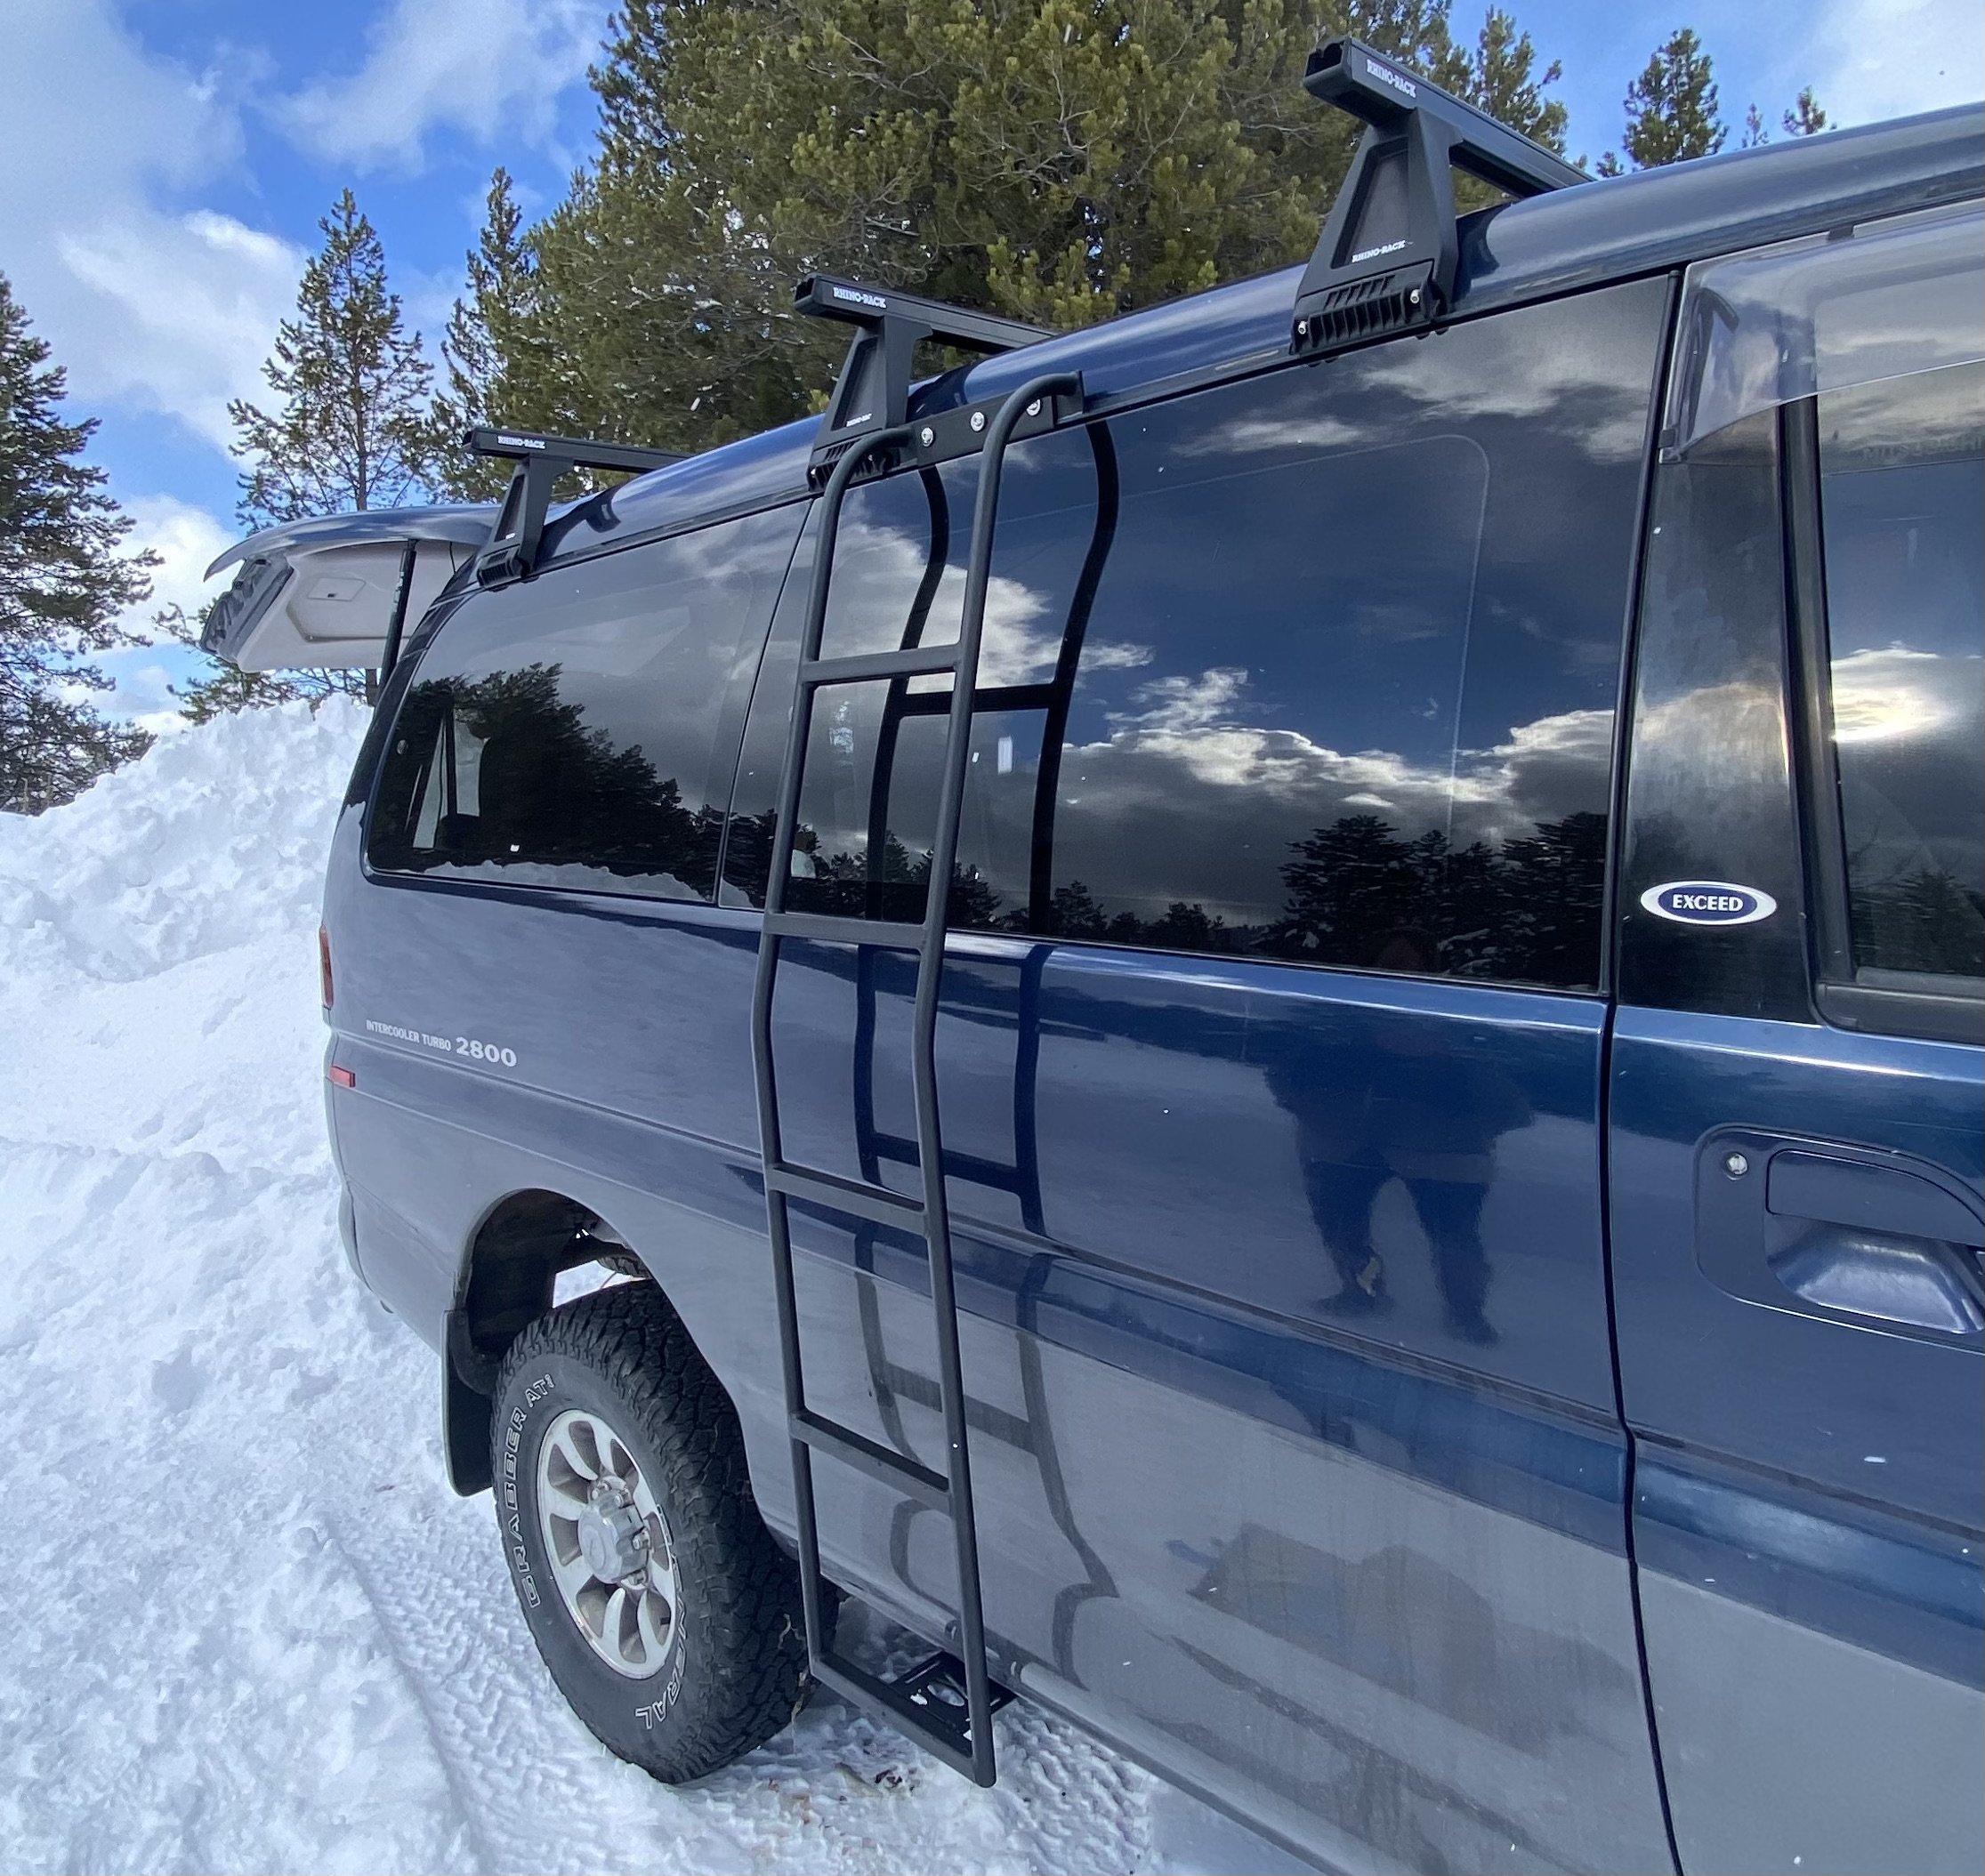
Rhino Rack Roof Bars and an Xplormor Ladder, our first mods.
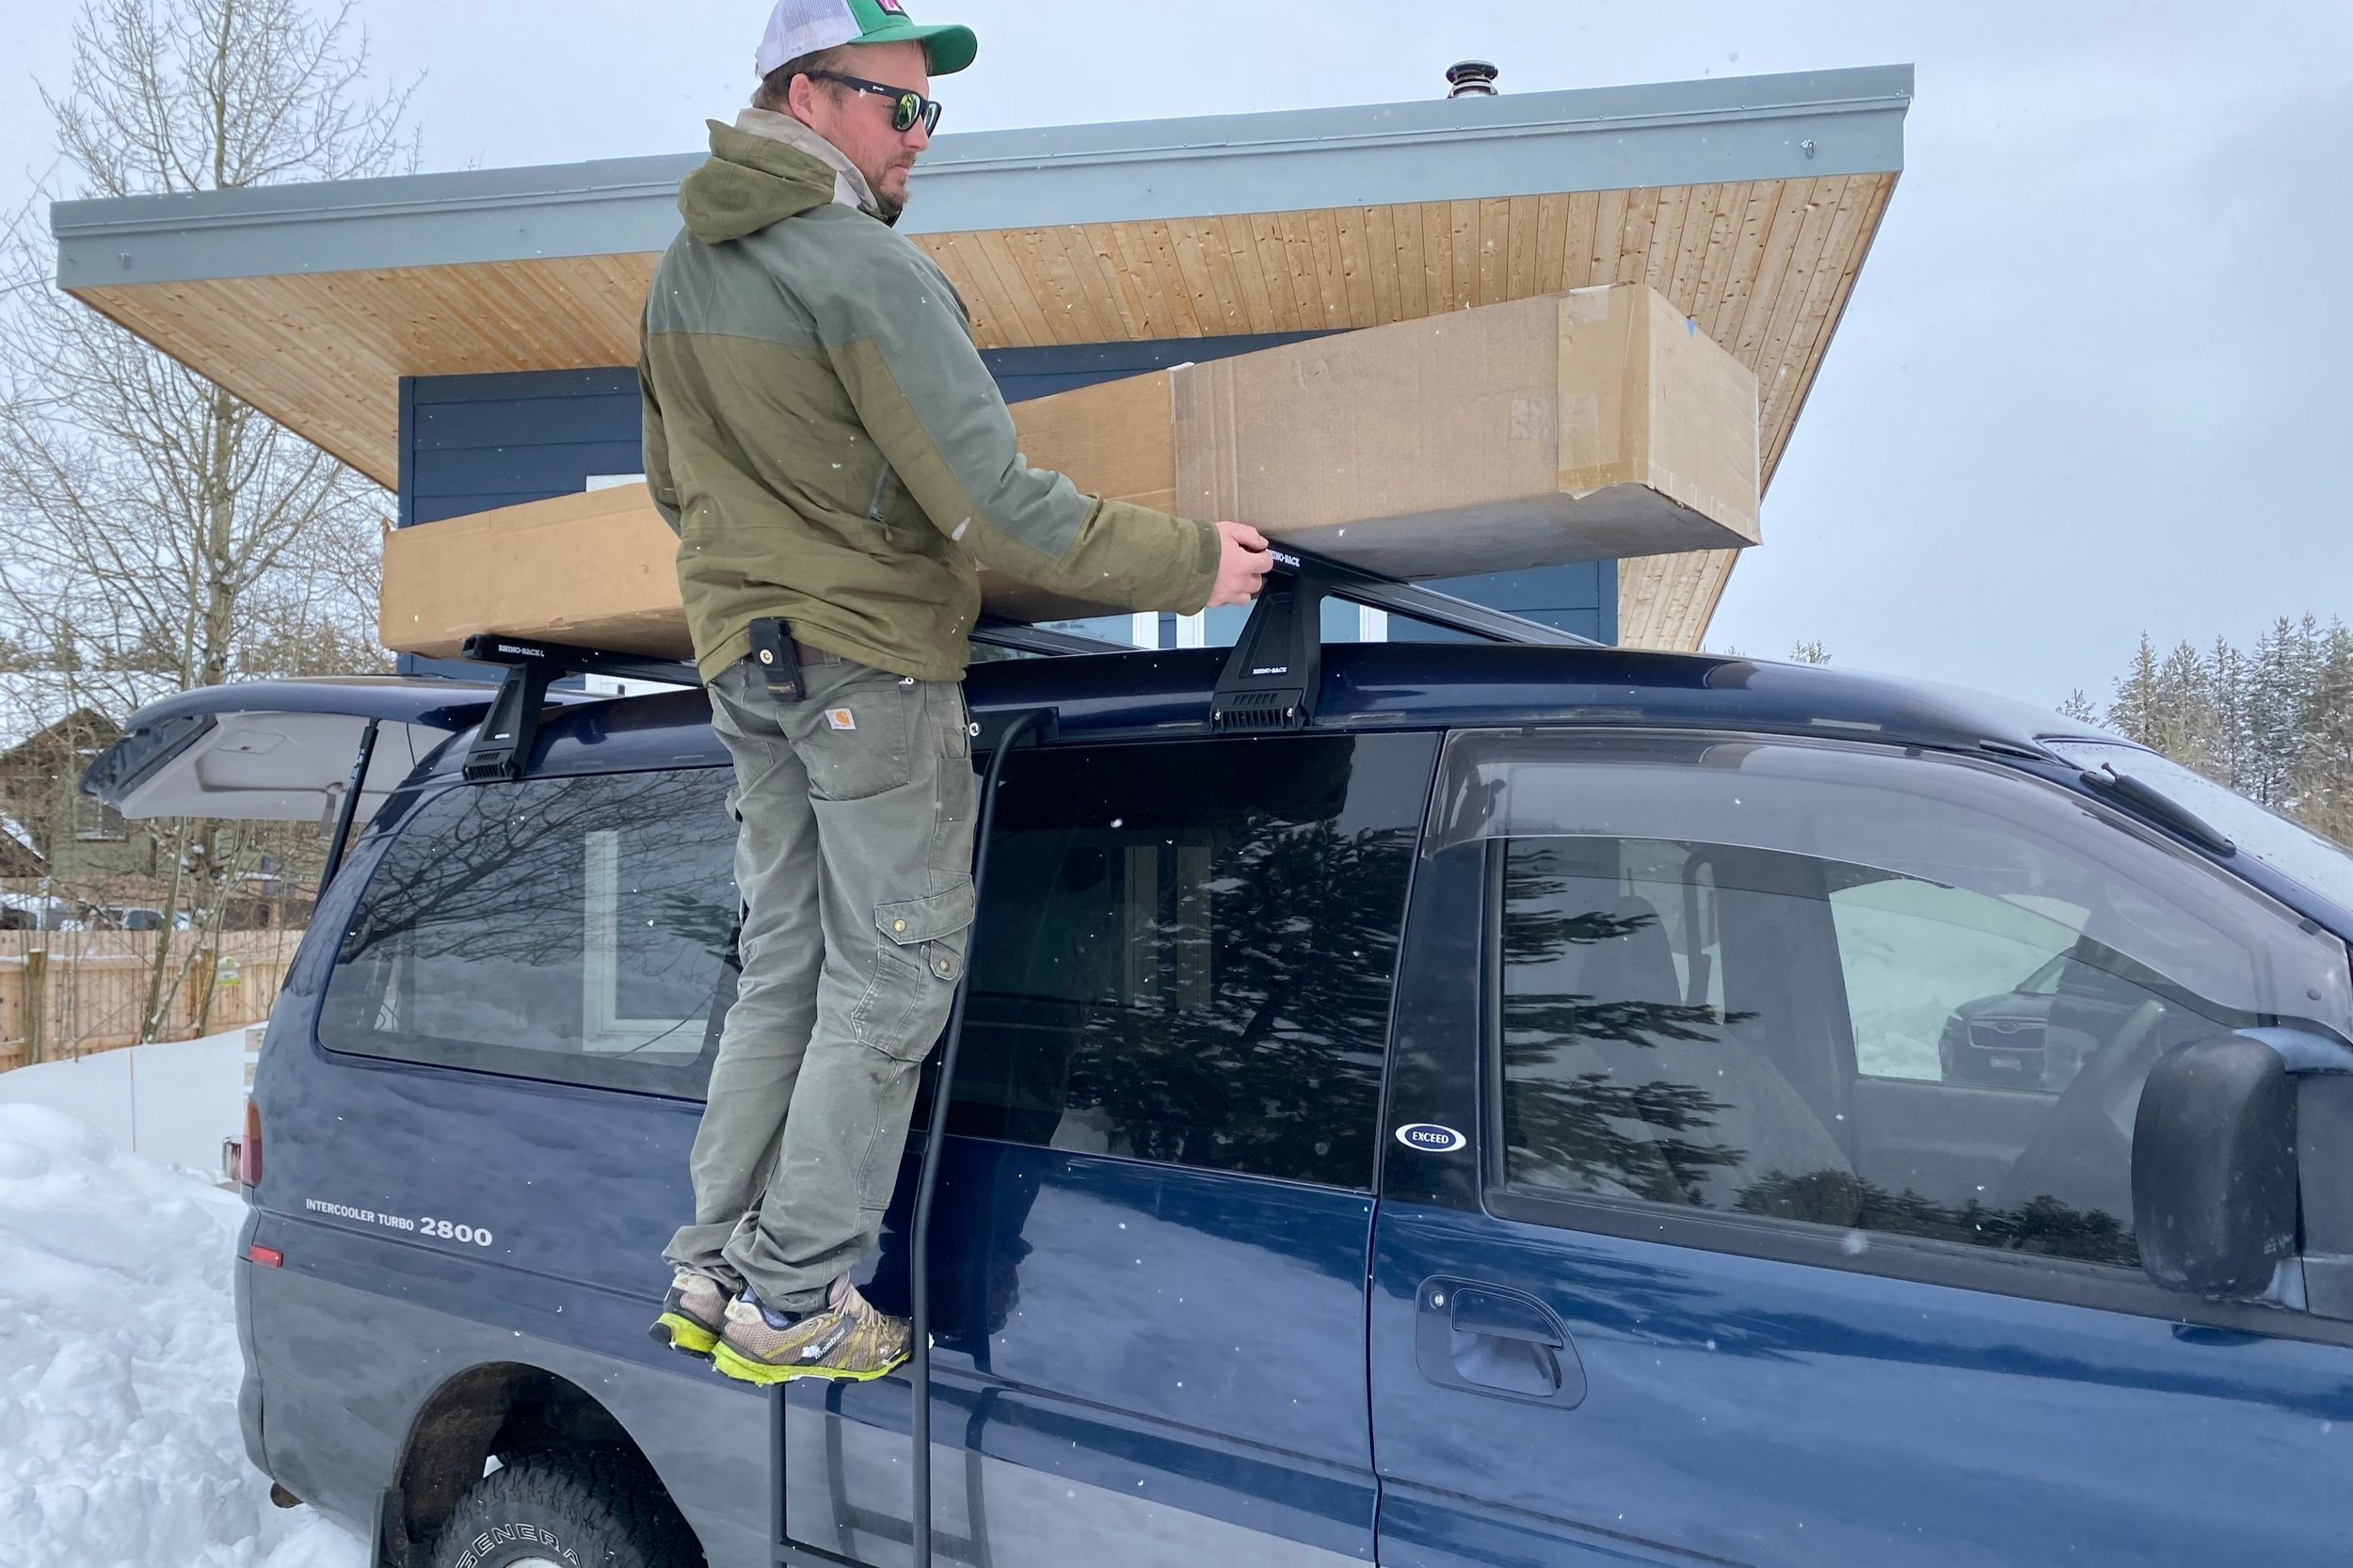
Test Fitting a mock up of the roof box we wanted to add.
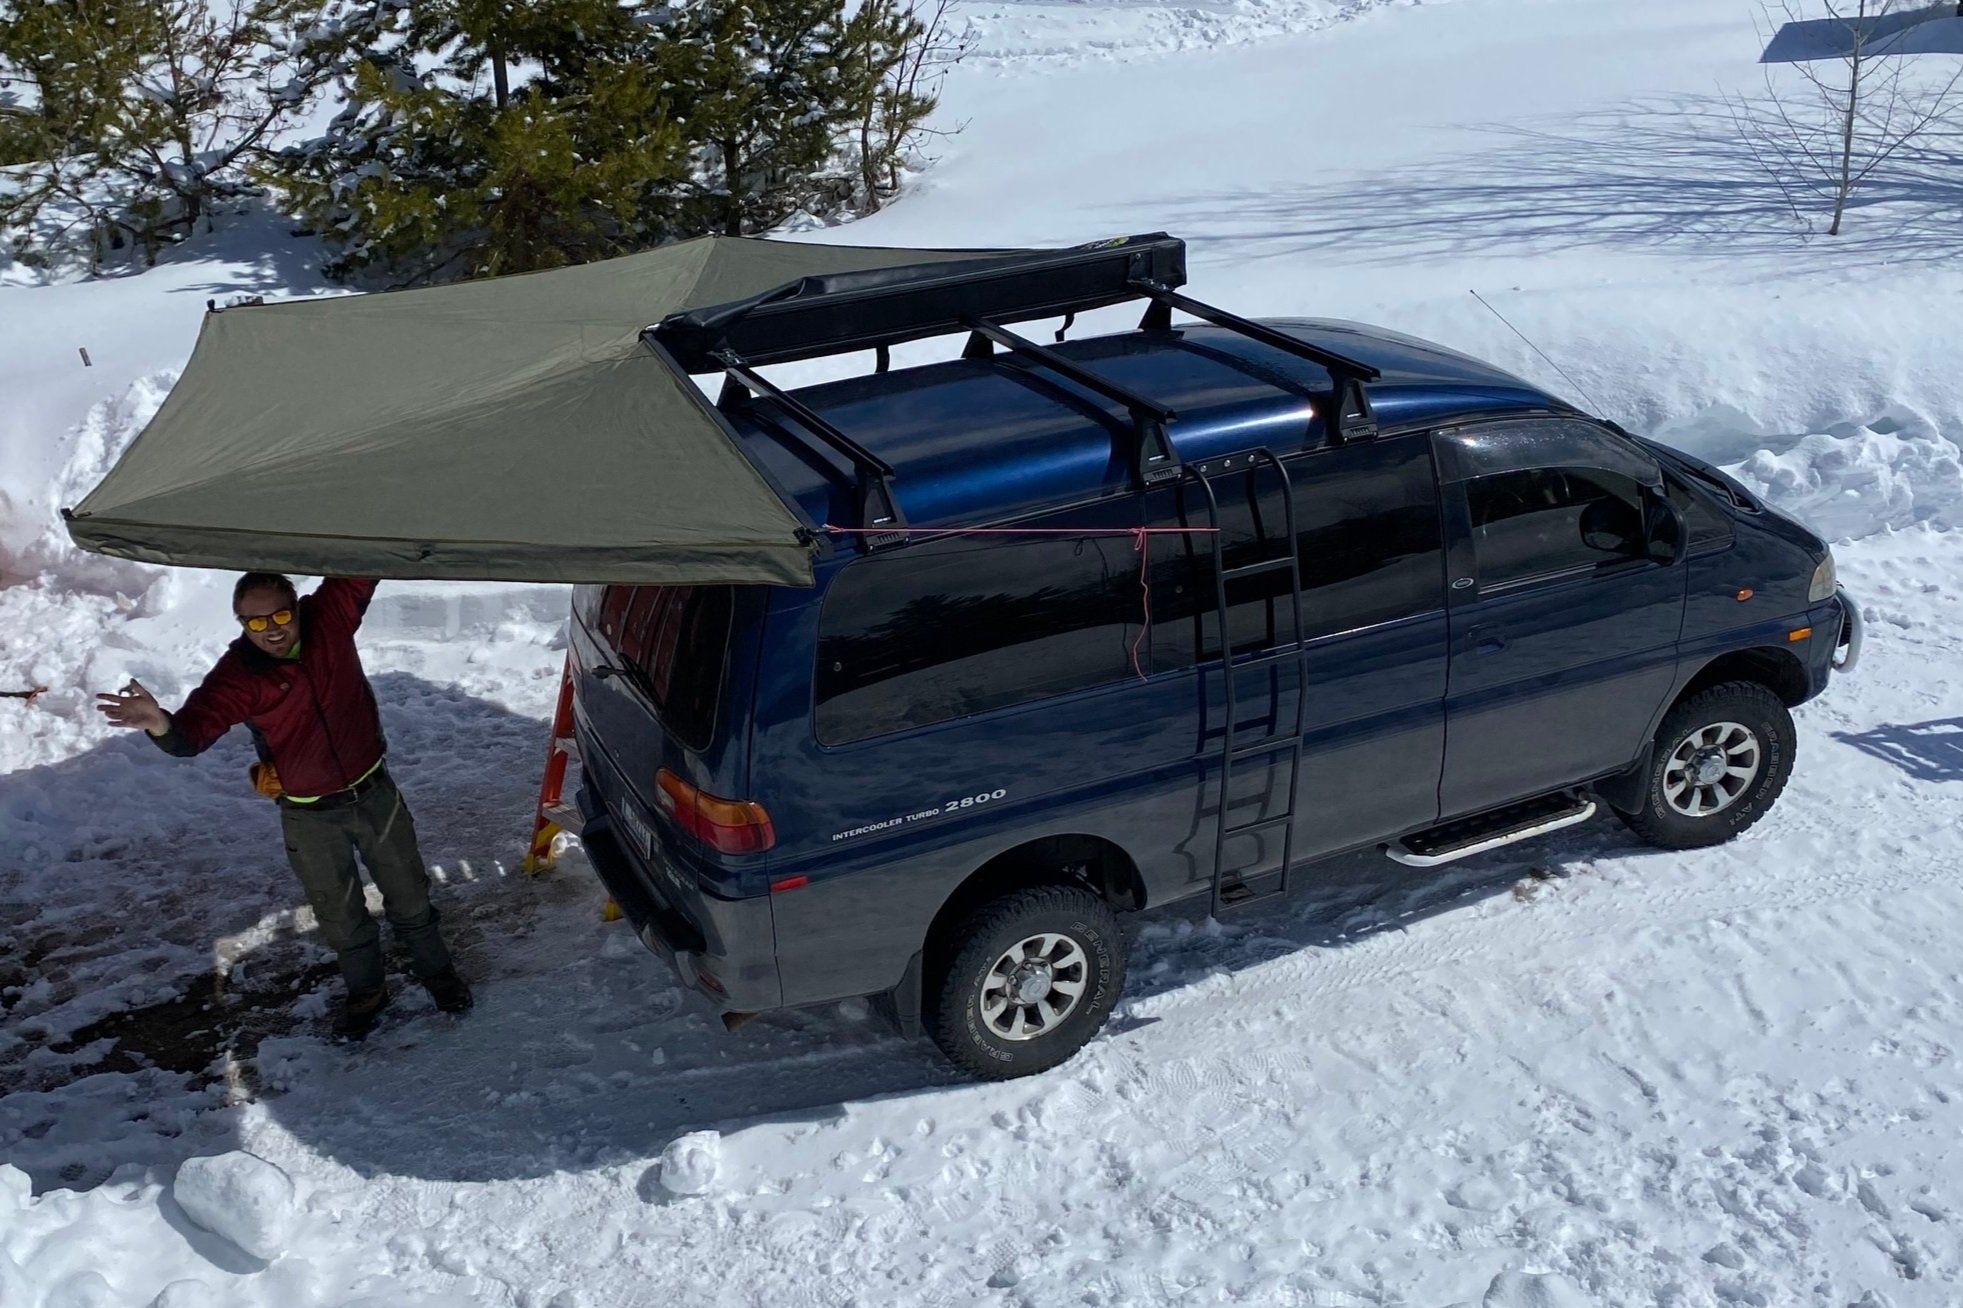
The Ironman 270 Awning provides shade in seconds.
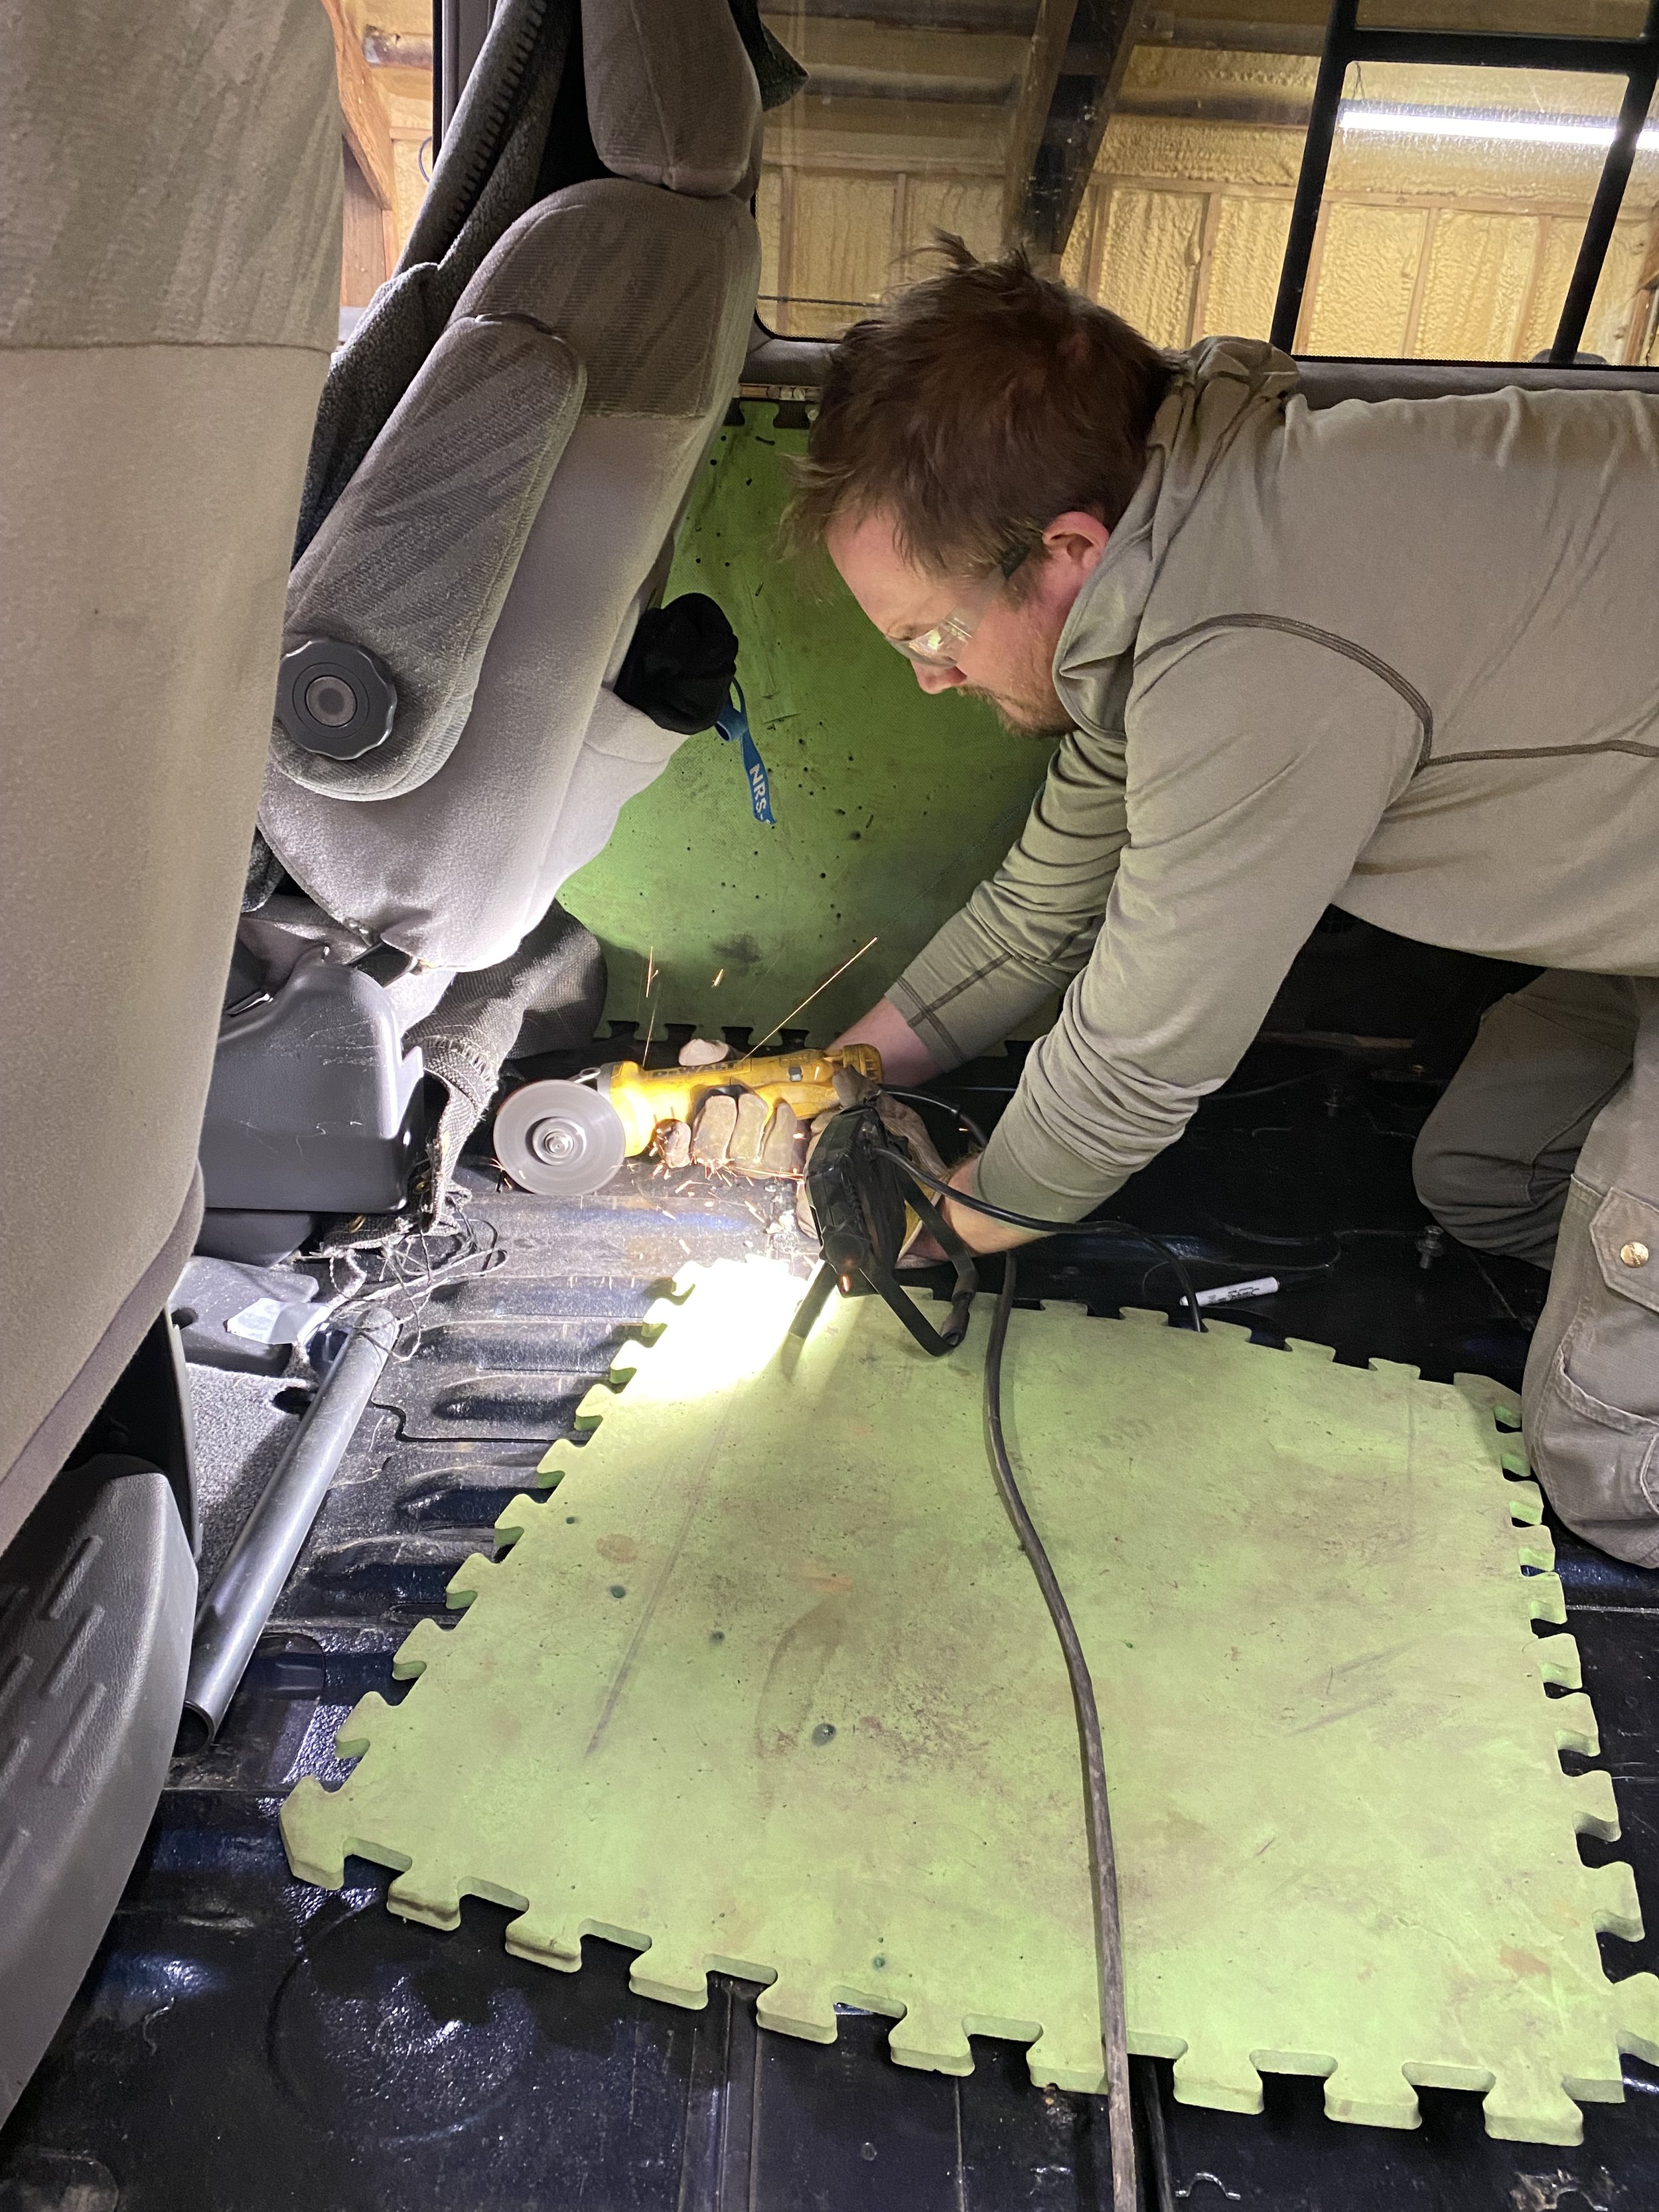
The next step was to start cutting, and really commit to whatever dream/nightmare we had cooked up. One of the few truths we knew about the van was that it was short on space, even if it was a long wheel base. Because of this, a rotating passenger seat was necessary. We had a few blog posts and a few youtube videos to reference, but in the end neither I nor the professional fabricator I employed were comfortable with the installation process. Instead, we sacrificed the ability to slide the passenger’s seat forward and backwards for the safety and security of proper welds. The passenger seat now rotates, reclines, and bolts very securely to the body.
In addition to the rotating front seat, we cut a hole in the floor of the van and built a small platform for a Webasto diesel heater. Our inaugural adventure was a ski trip planned for early spring, just after the local ski hills closed, so we splurged on supplemental heat.

Mounting the Passenger chair Swivel - this took a lot of heavy thinking.
Cutting the hole for the webasto heater. This cut was right next to a brake line, no pressure.
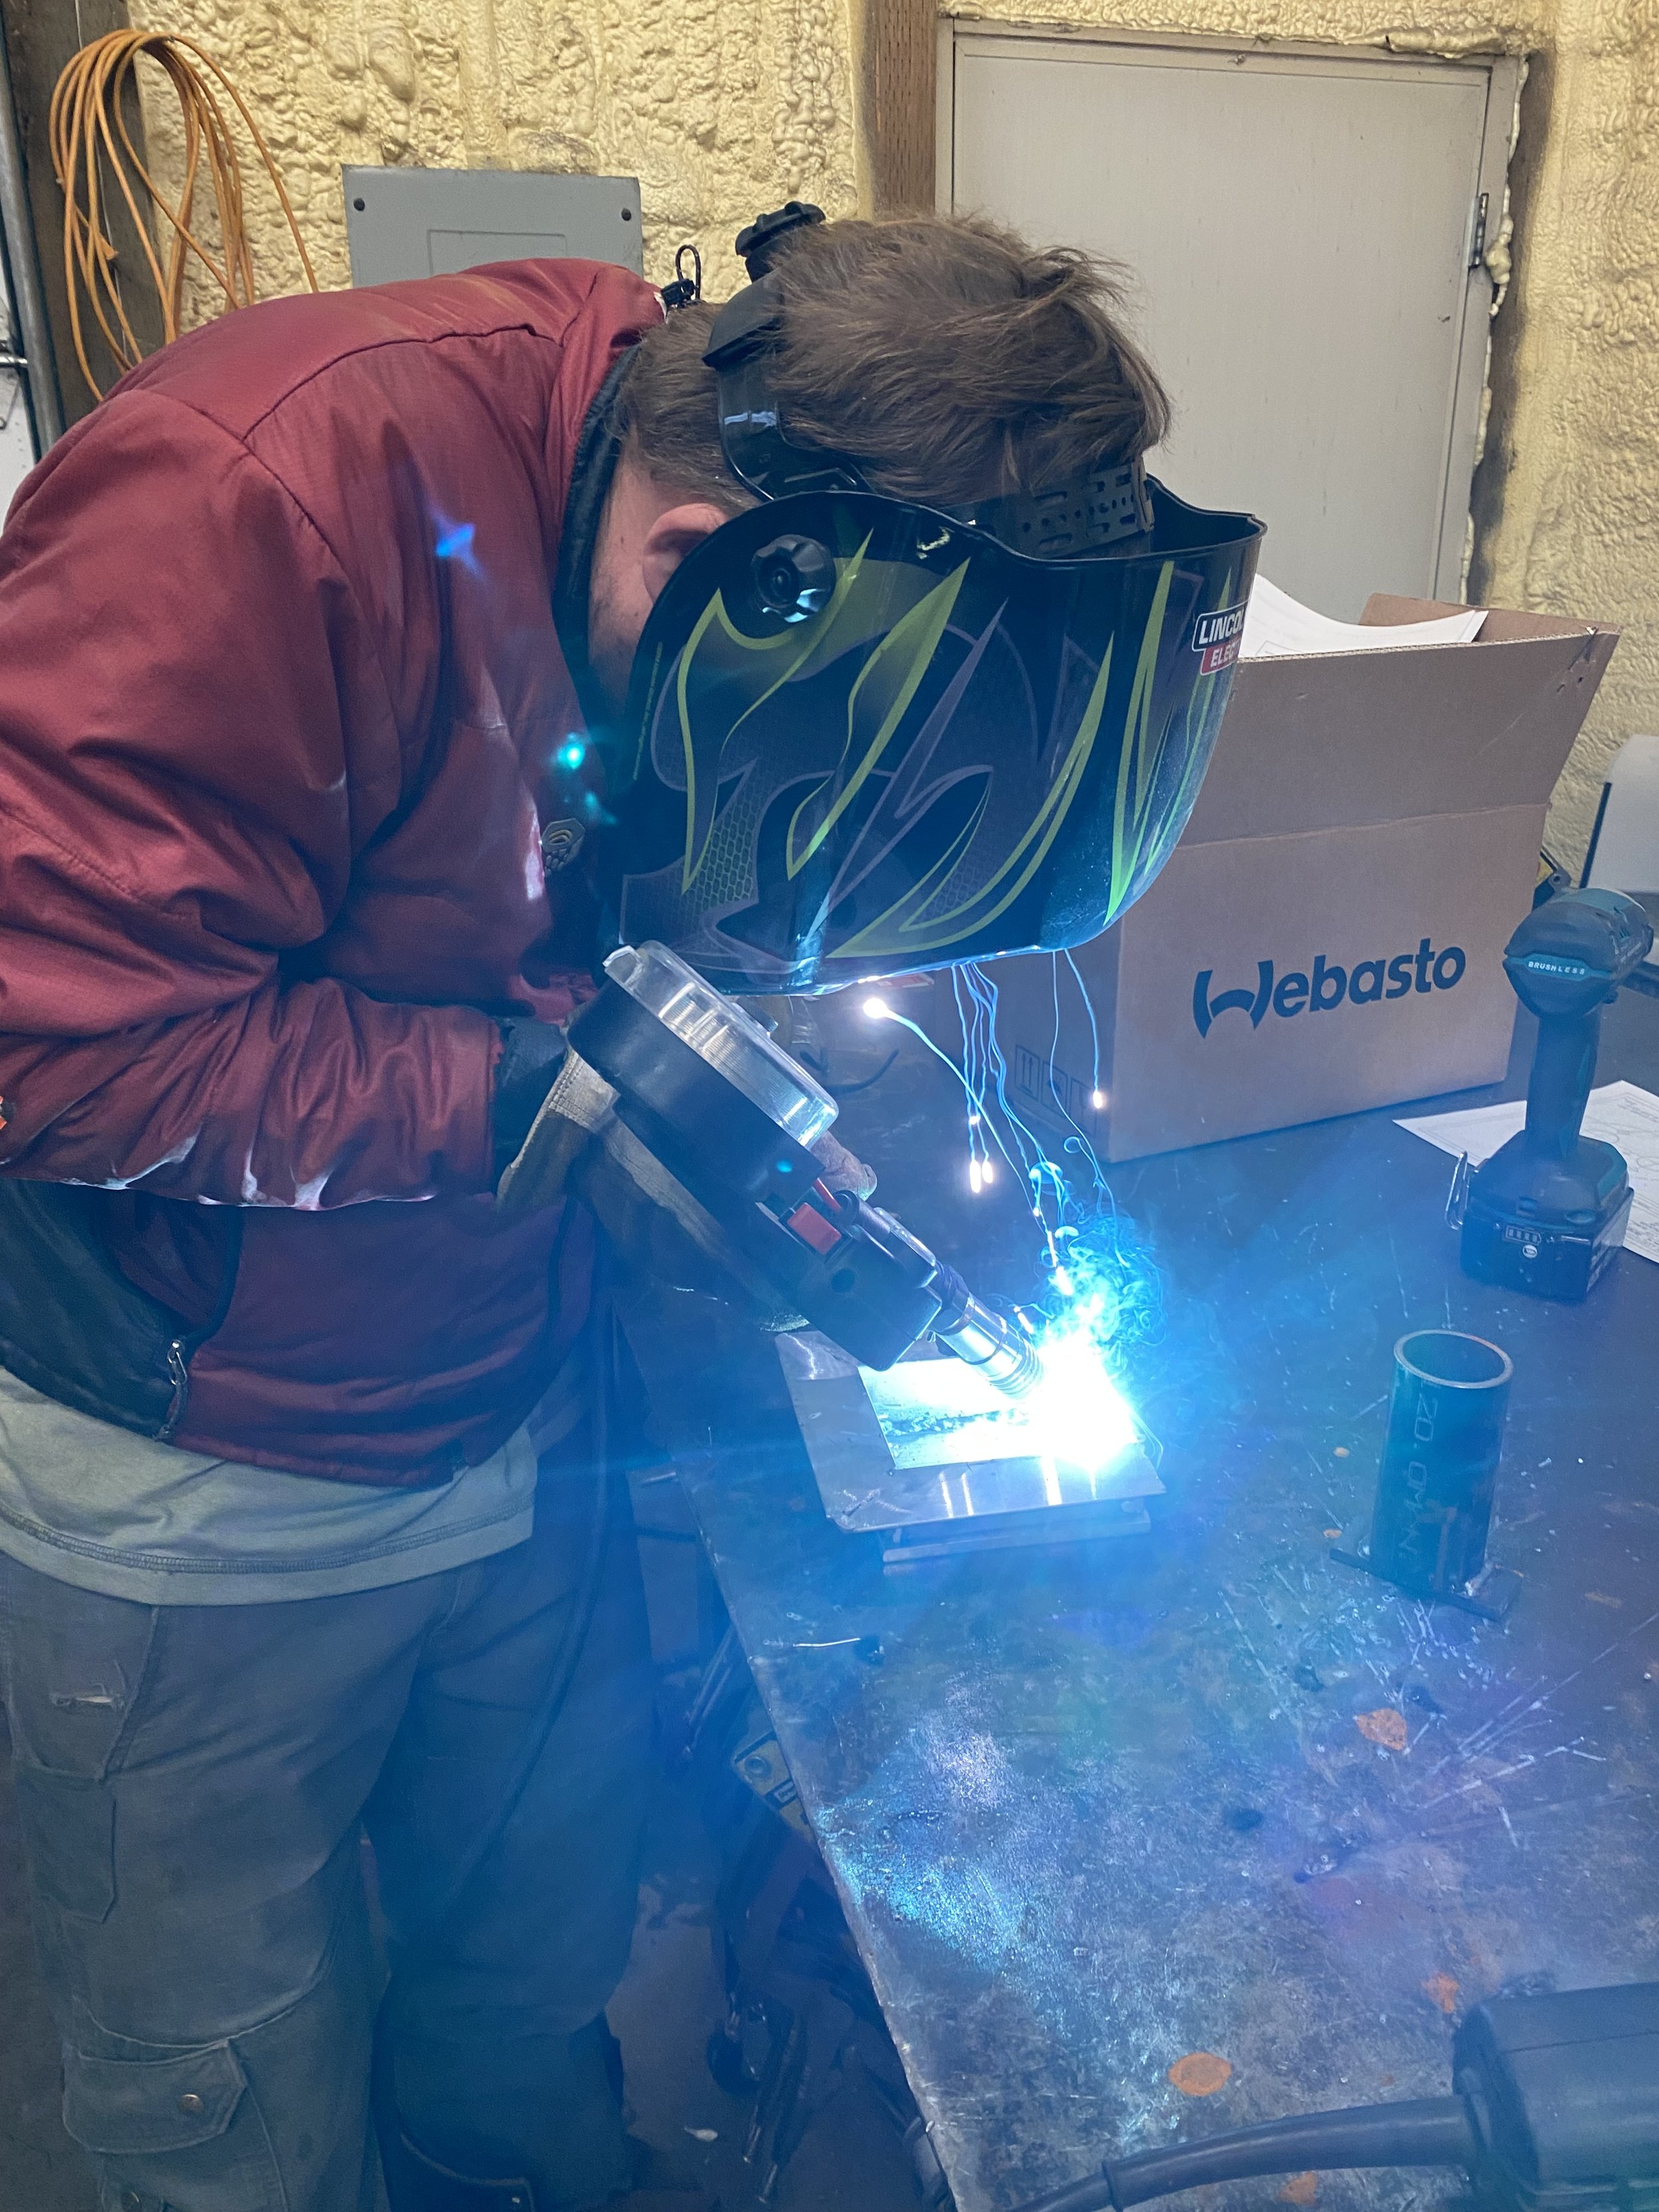
Welding the Aluminum platform for the Webasto heater.

Heater Mounted!
With the passenger’s seat in “camp mode”, we were able to start playing with the layout of the van’s bed, the living space of our SpaceGear. We busted out some boxes, crates, and Paco Pads to allow us to dial in our bed height and length. We found our sweet spot of head space and storage space, scribbled some notes in a journal, and started wishing for the winter’s snow to recede so we could get to fabricating.
In the mean time, we added a new JVC head unit for the stereo to replace the tape deck. Installation was much more straight forward than I had initially feared, and the fit was perfect. The head unit really updated the van, and it supports Apple Carplay which is huge for navigating Mexican city streets.

Test fitting a standard sized Tuttle. We had to get the height of the bed platform just right.

Adding a modern head unit for better navigation and tunes.
With a layout in mind, we tore out the original carpet and insulation, and installed a subfloor of 1/2 plywood. It was a challenge to line up the original seat anchors and tie the three pieces of plywood together, but after many rounds of fitting and refitting, we got it. We used Reflectix foil insulation as an underlayment and we scored a remanent of marmoleum from a local flooring supplier. We were initially jazzed on the marmoleum because it would allow us to install a floor with no seams, but we did eventually swap it out for a peel-and-stick tile solution, as the marmoleum bubbled up a lot with temperature changes.

One of many attempts to attach the subfloor.
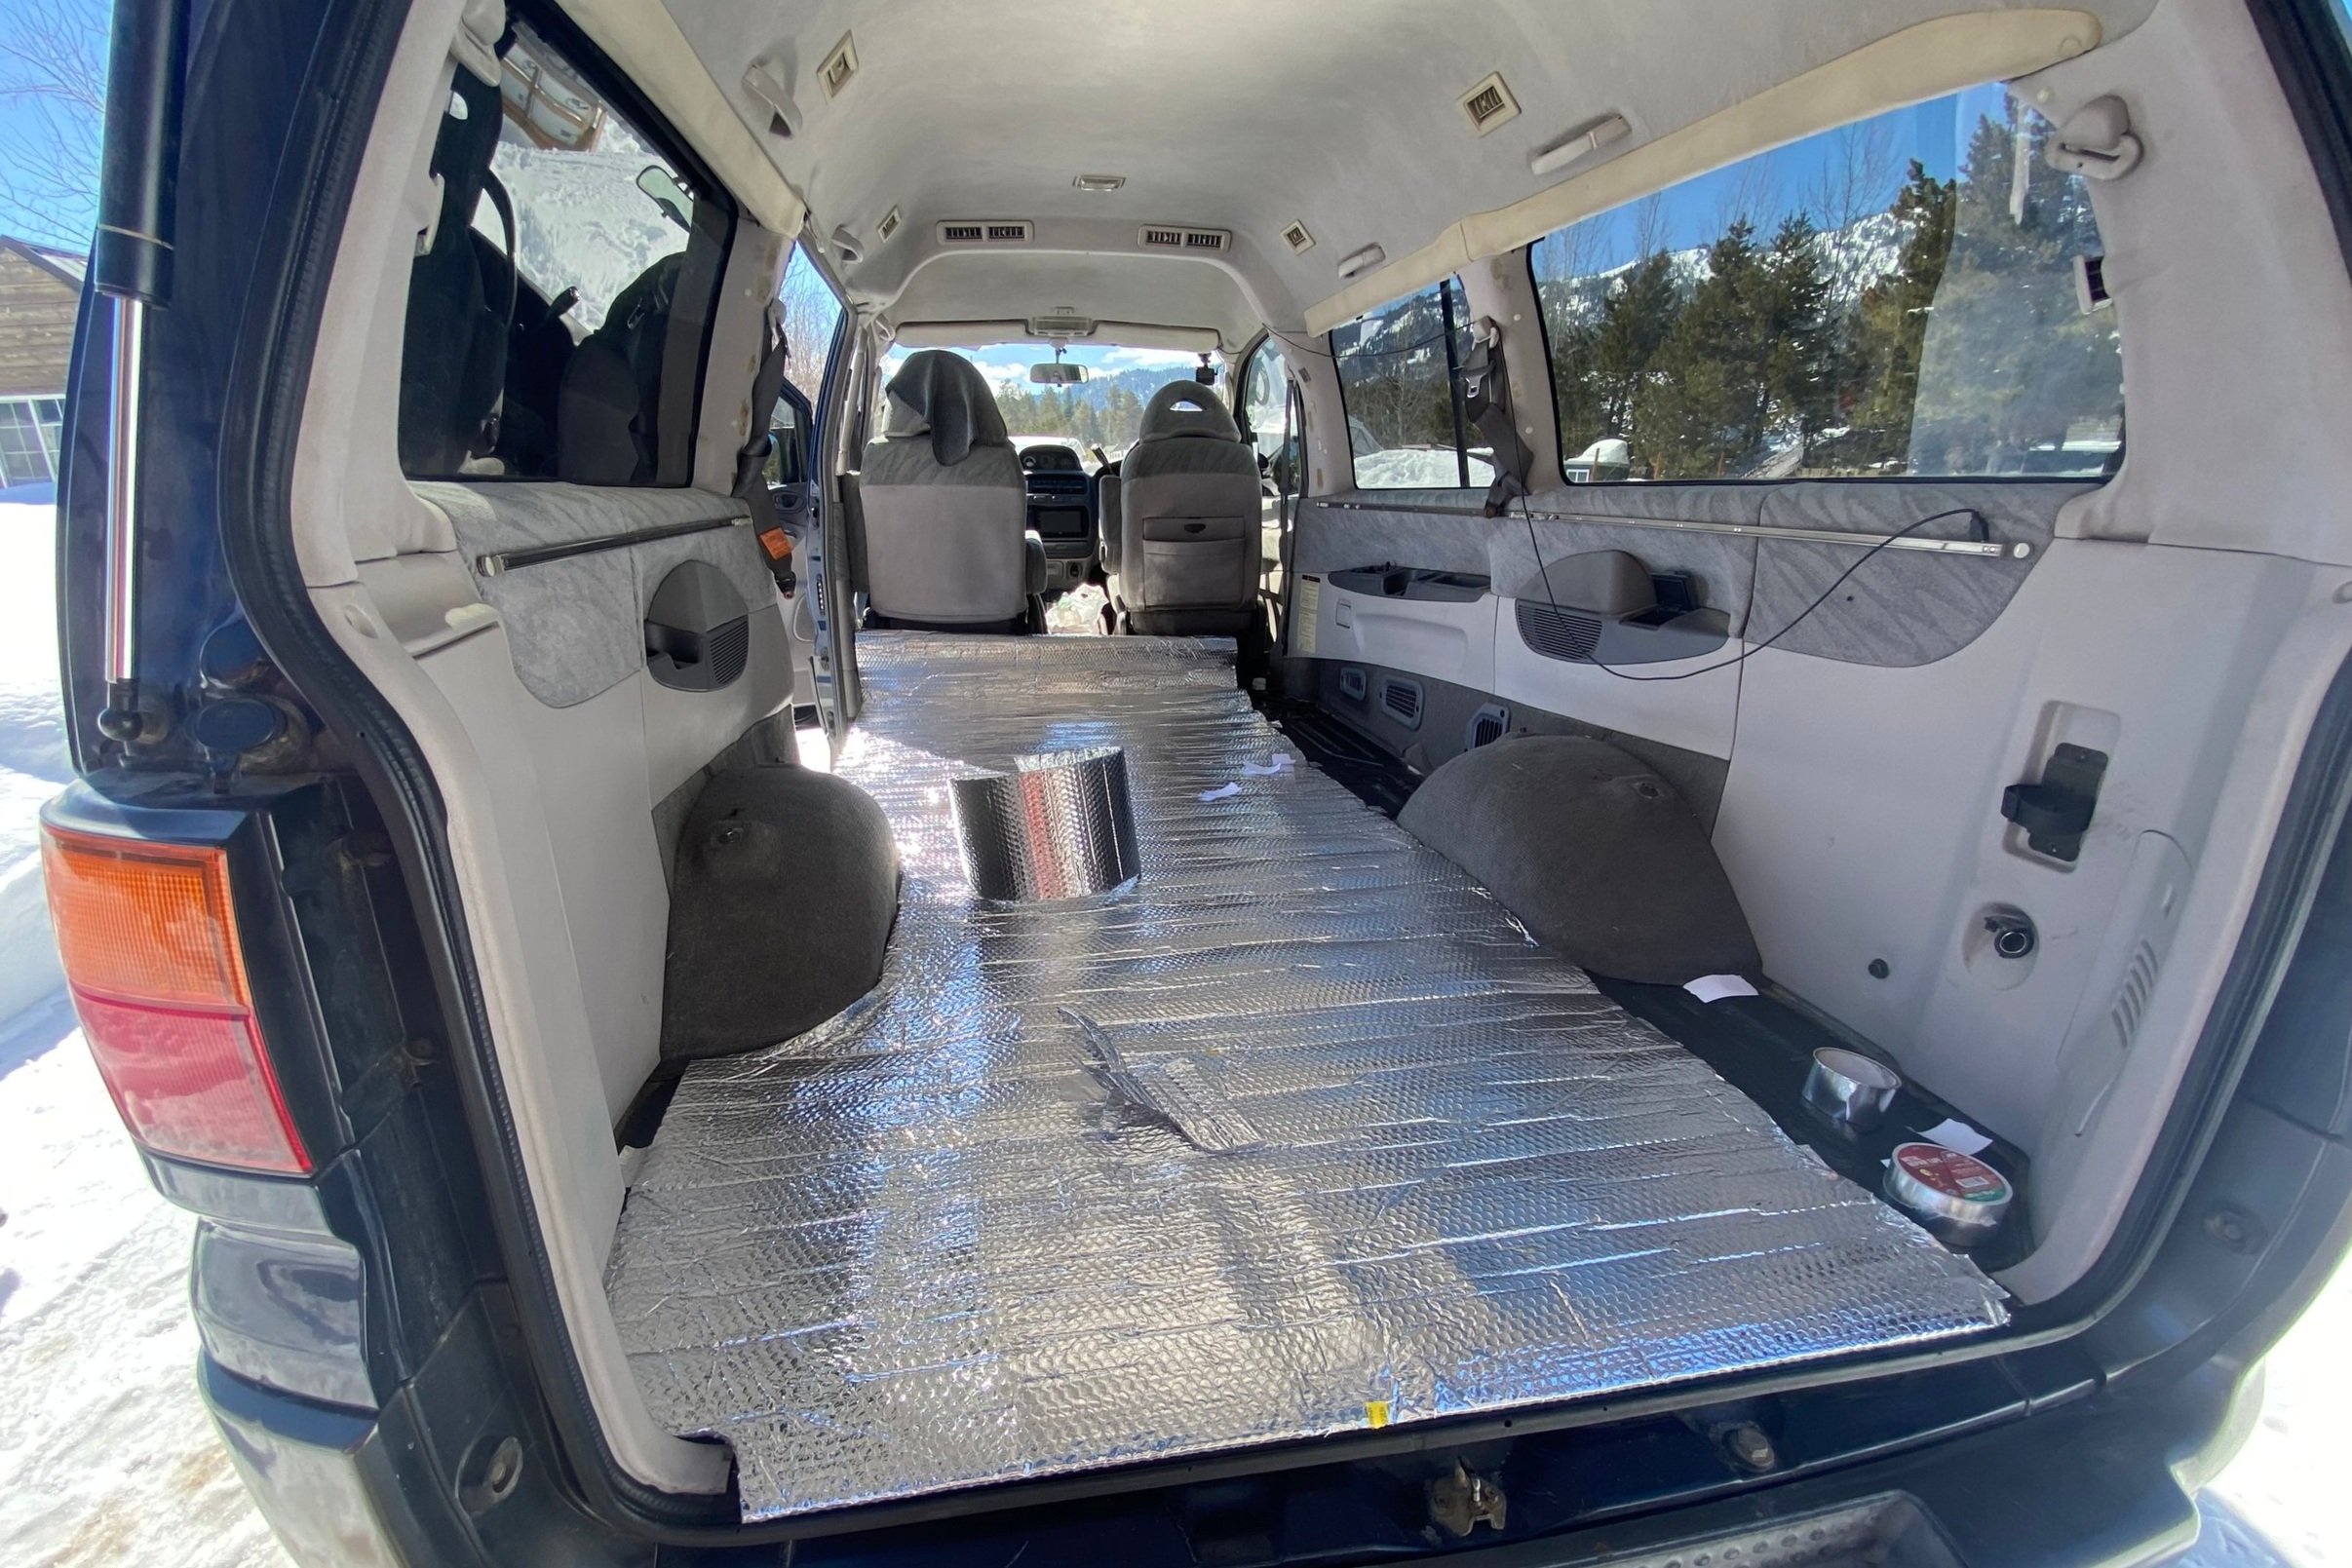
Once we knew the subfloor was finished, we rolled out the insulation.

tracing our flooring.
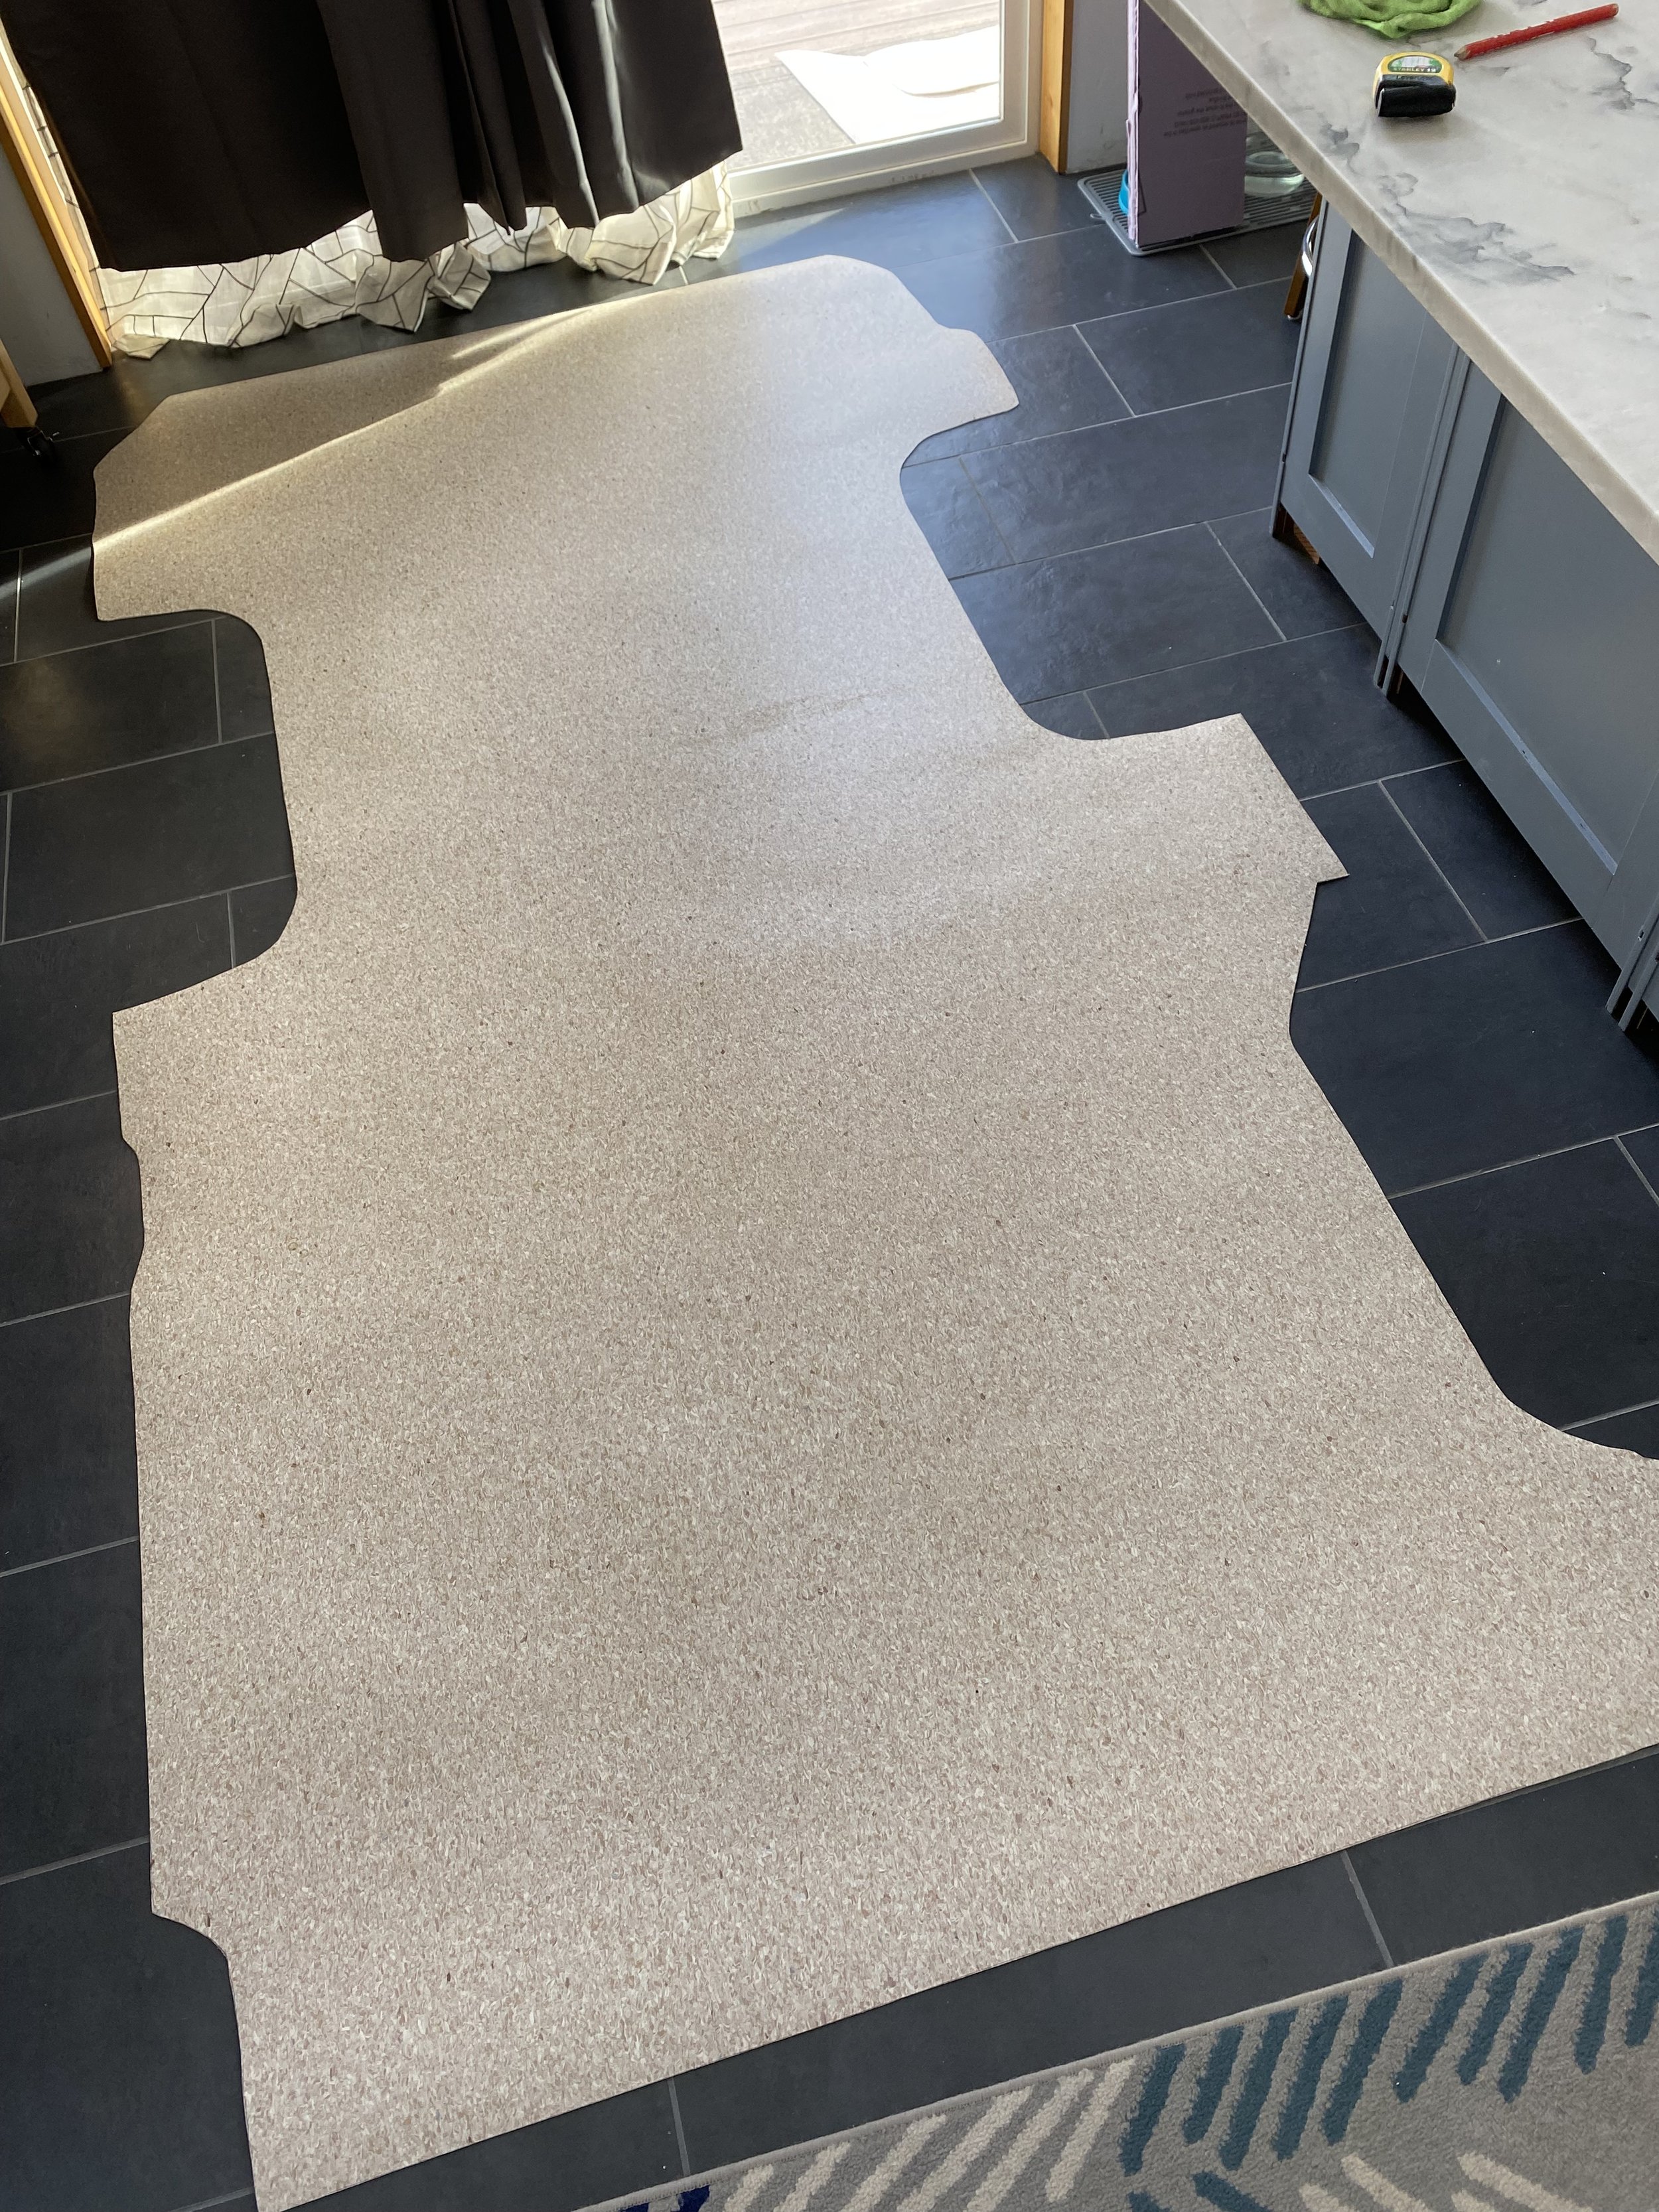
Floor traced and cut!

Fiddling. But at least fiddling on dirt and not on snow.
With the floor installed, it was time to start laying out the skeleton of the 12v house circuits by mounting our Renogy charge controller and attaching it to our house battery, our vehicle battery, and our solar panel. This required drilling a hole through the roof of the van and fitting a weather proof wiring housing. We decided not to remove the original headliner, and to just work through/around it. The headliner and the interior trim was in good enough condition to keep, but in bad enough condition that a few modifications wouldn’t be that noticable.
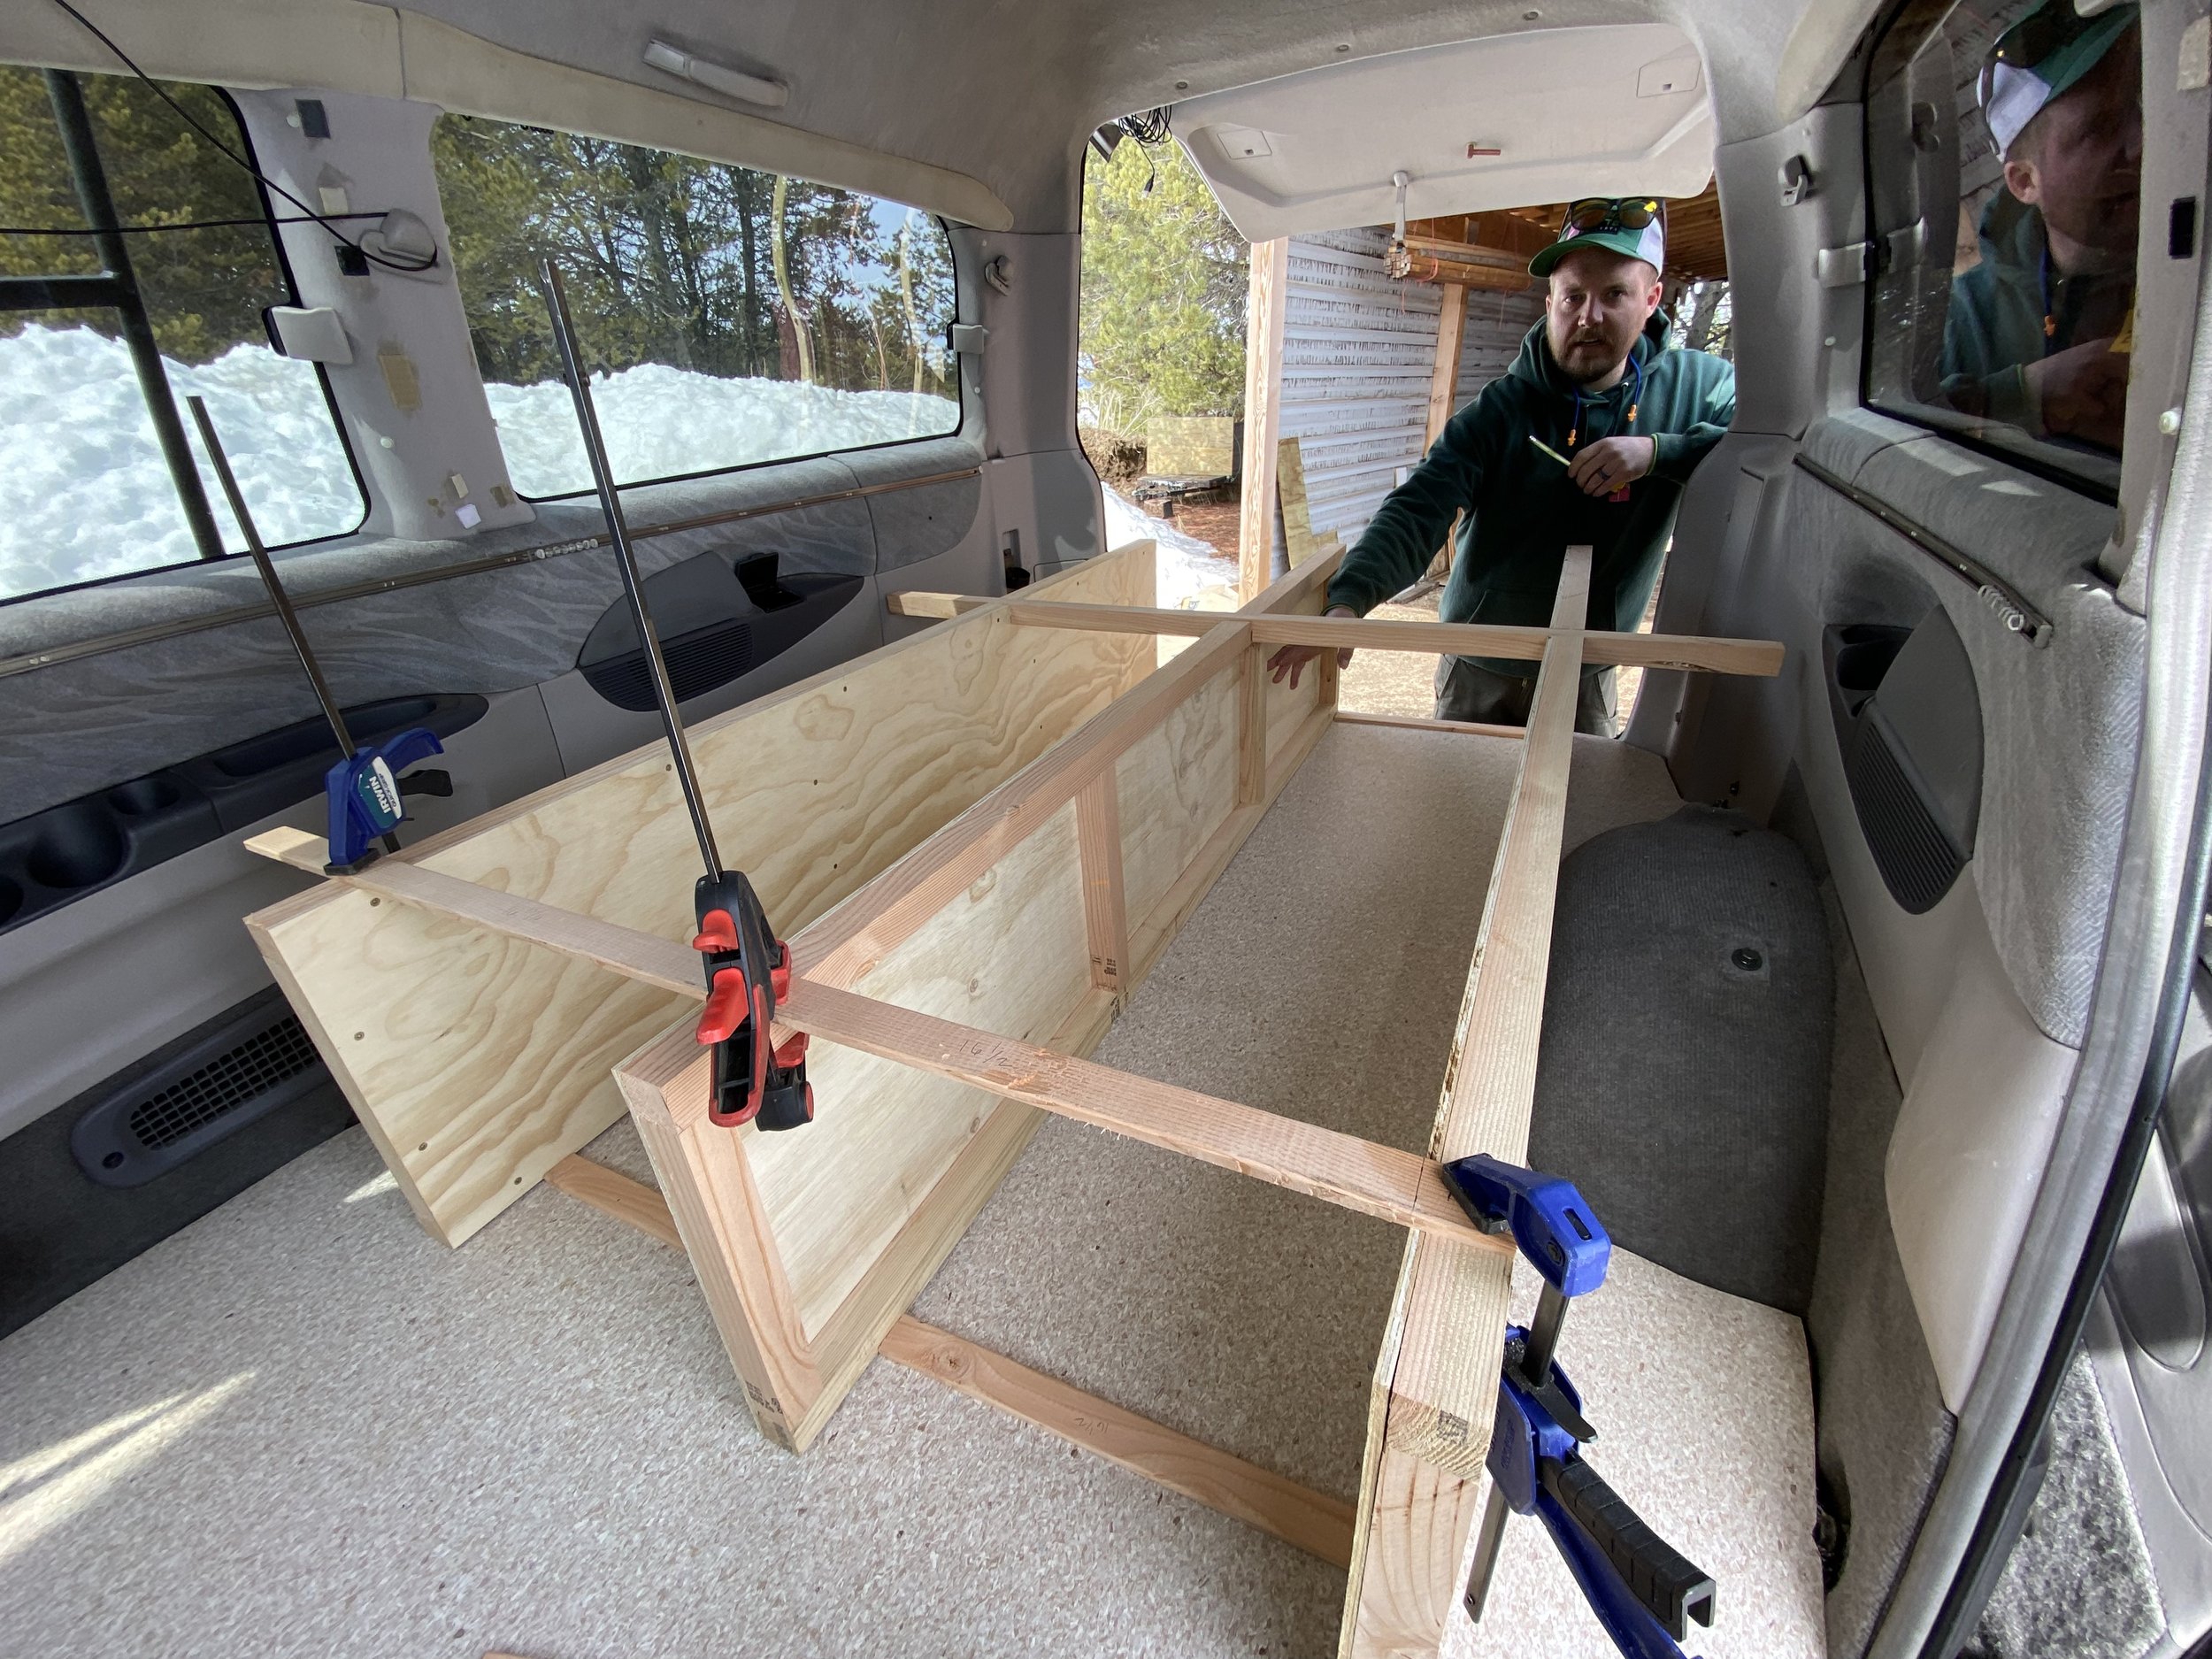
Next came the bed frame, which was the heart of the camper build. We debated using 80/20 extruded aluminum, because its so popular in the van-life world on youtube, but it was way too expensive and the lead times on orders were out of our build window. Instead, I ripped some 2x4 lumber into 1.5x1.5 inch strips and constructed a simple bed platform. The three vertical supports run full length and are faced with 1/4 plywood acting as a web stiffener. A sheet of 1/2 ply on the top of the bed tied everything together and was more than strong enough to support the three of us.
We tossed our Paco Pads on the platform for a mattress, packed our kitchen box and our skis, and hit the road!

Taking the plunge and drilling a hole in a perfectly good roof.
I think this will work…
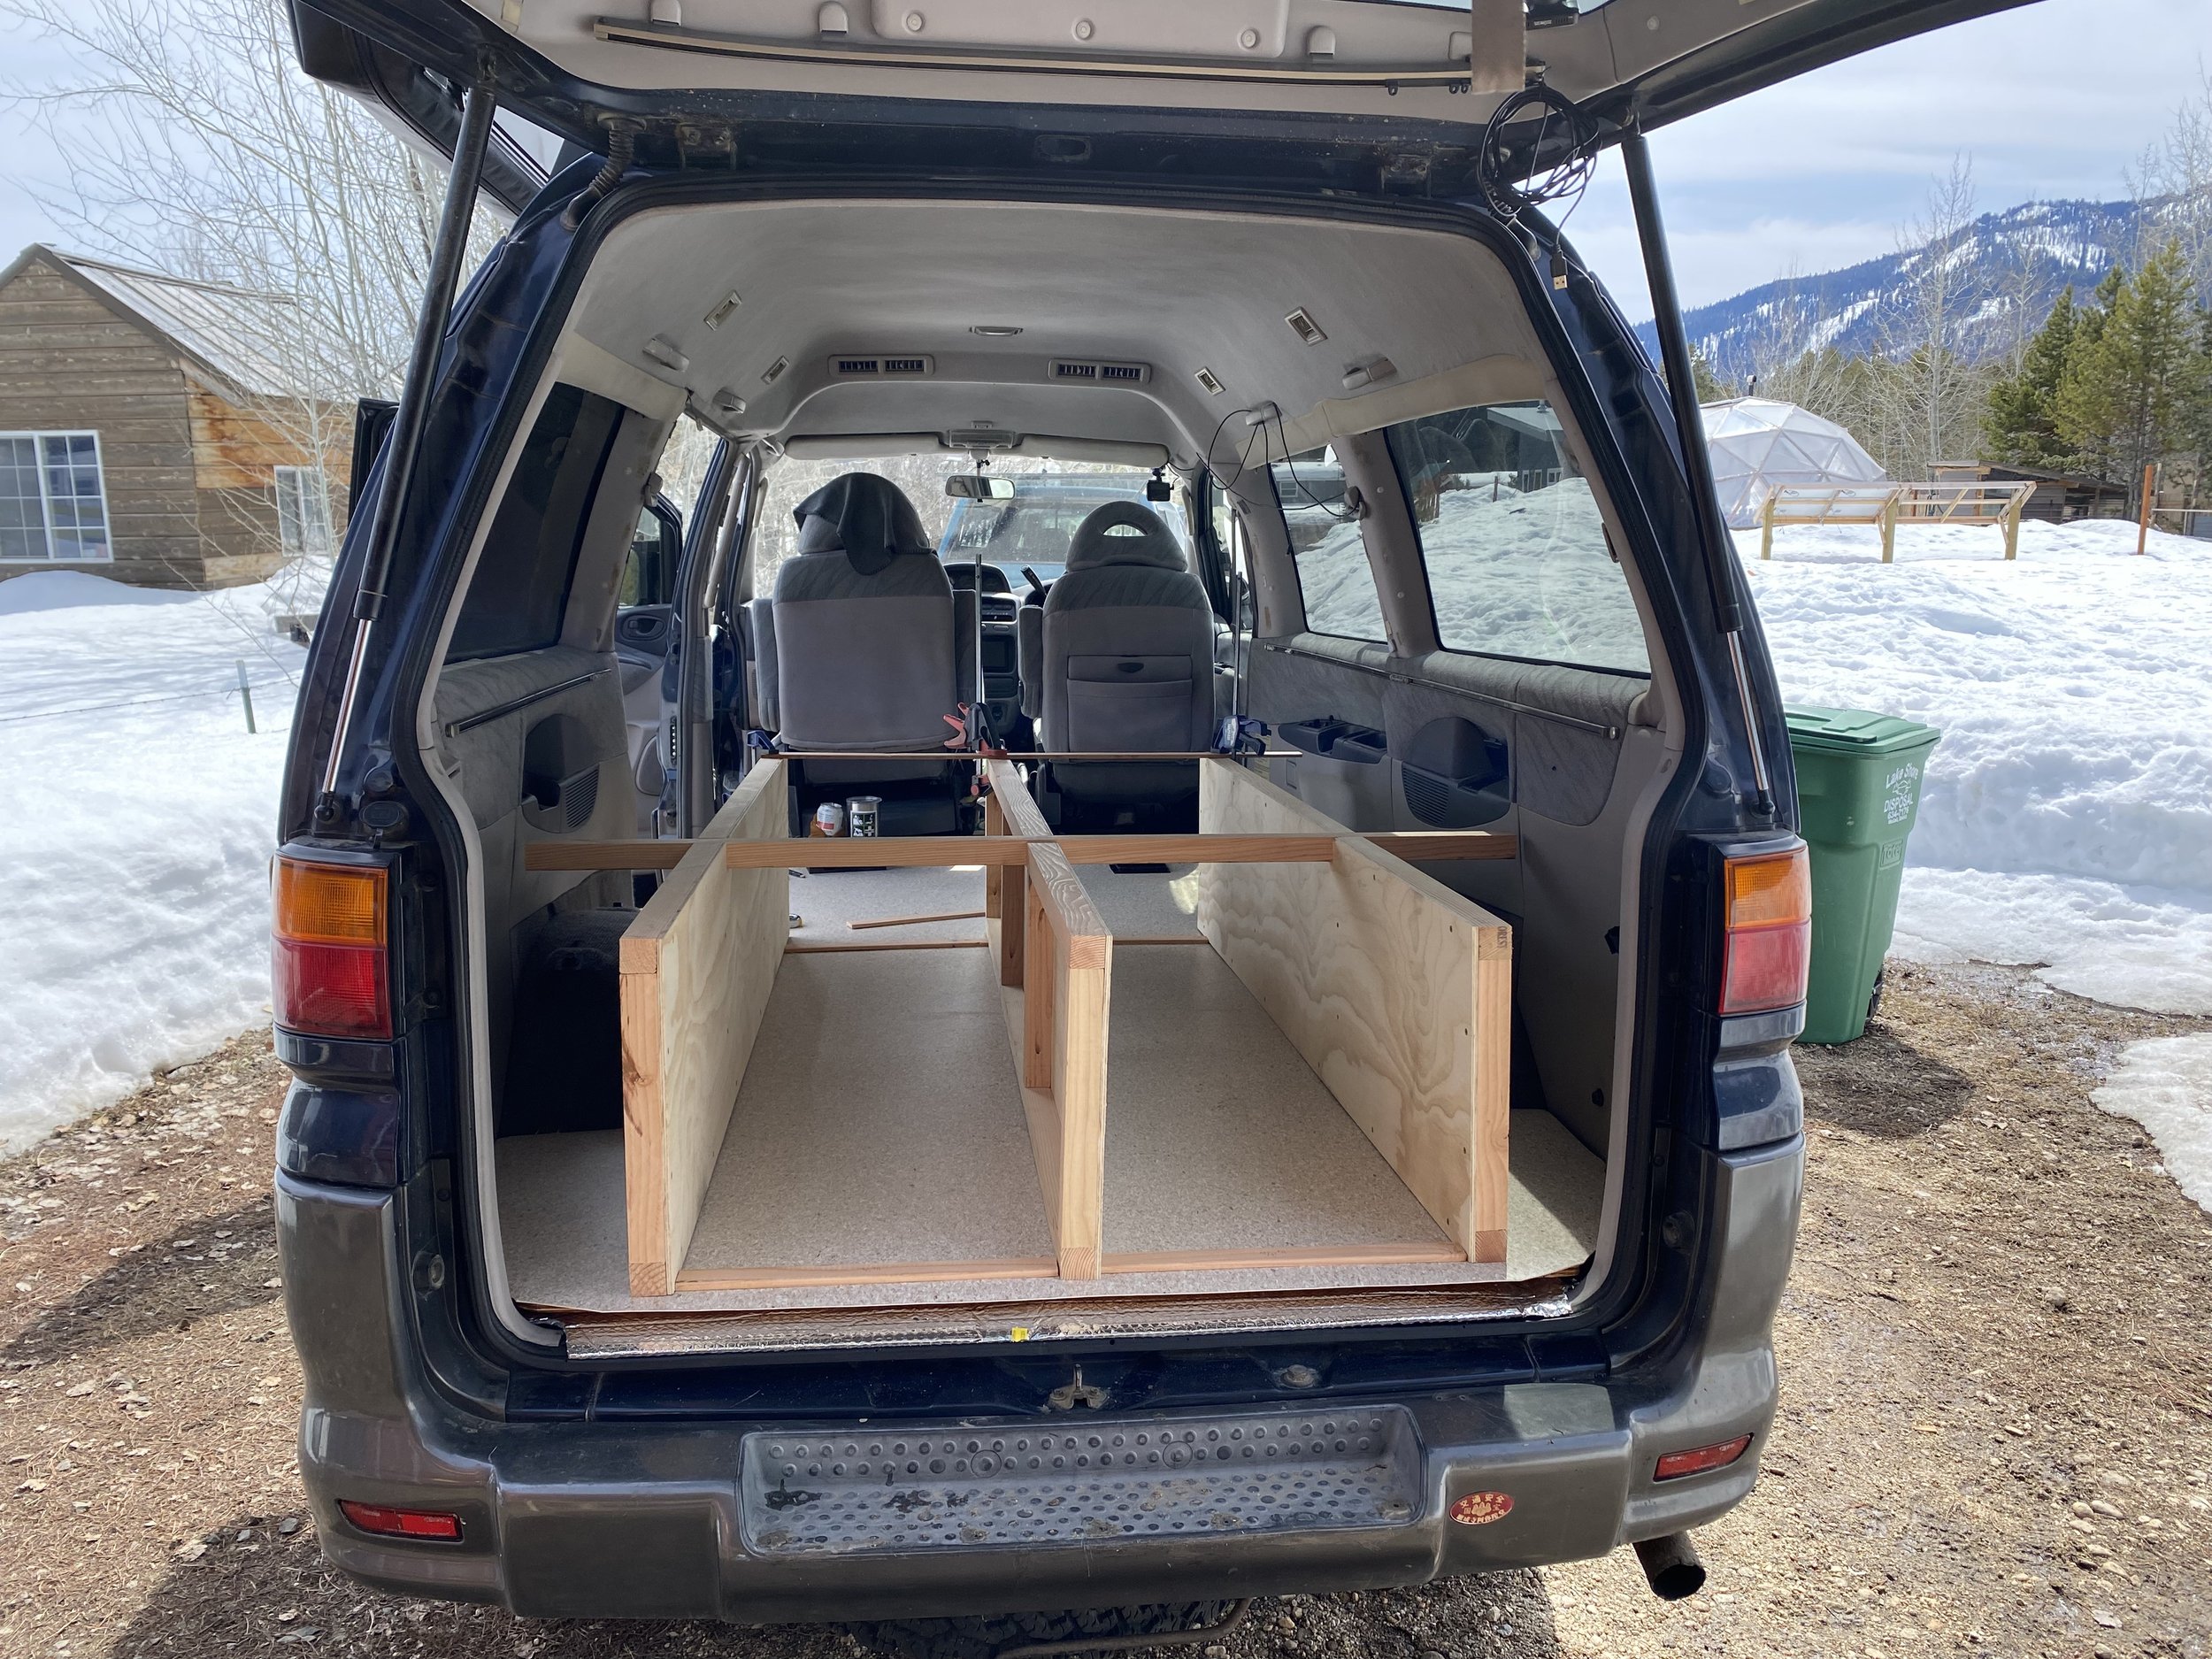
Bed platform mocked up and coming together.
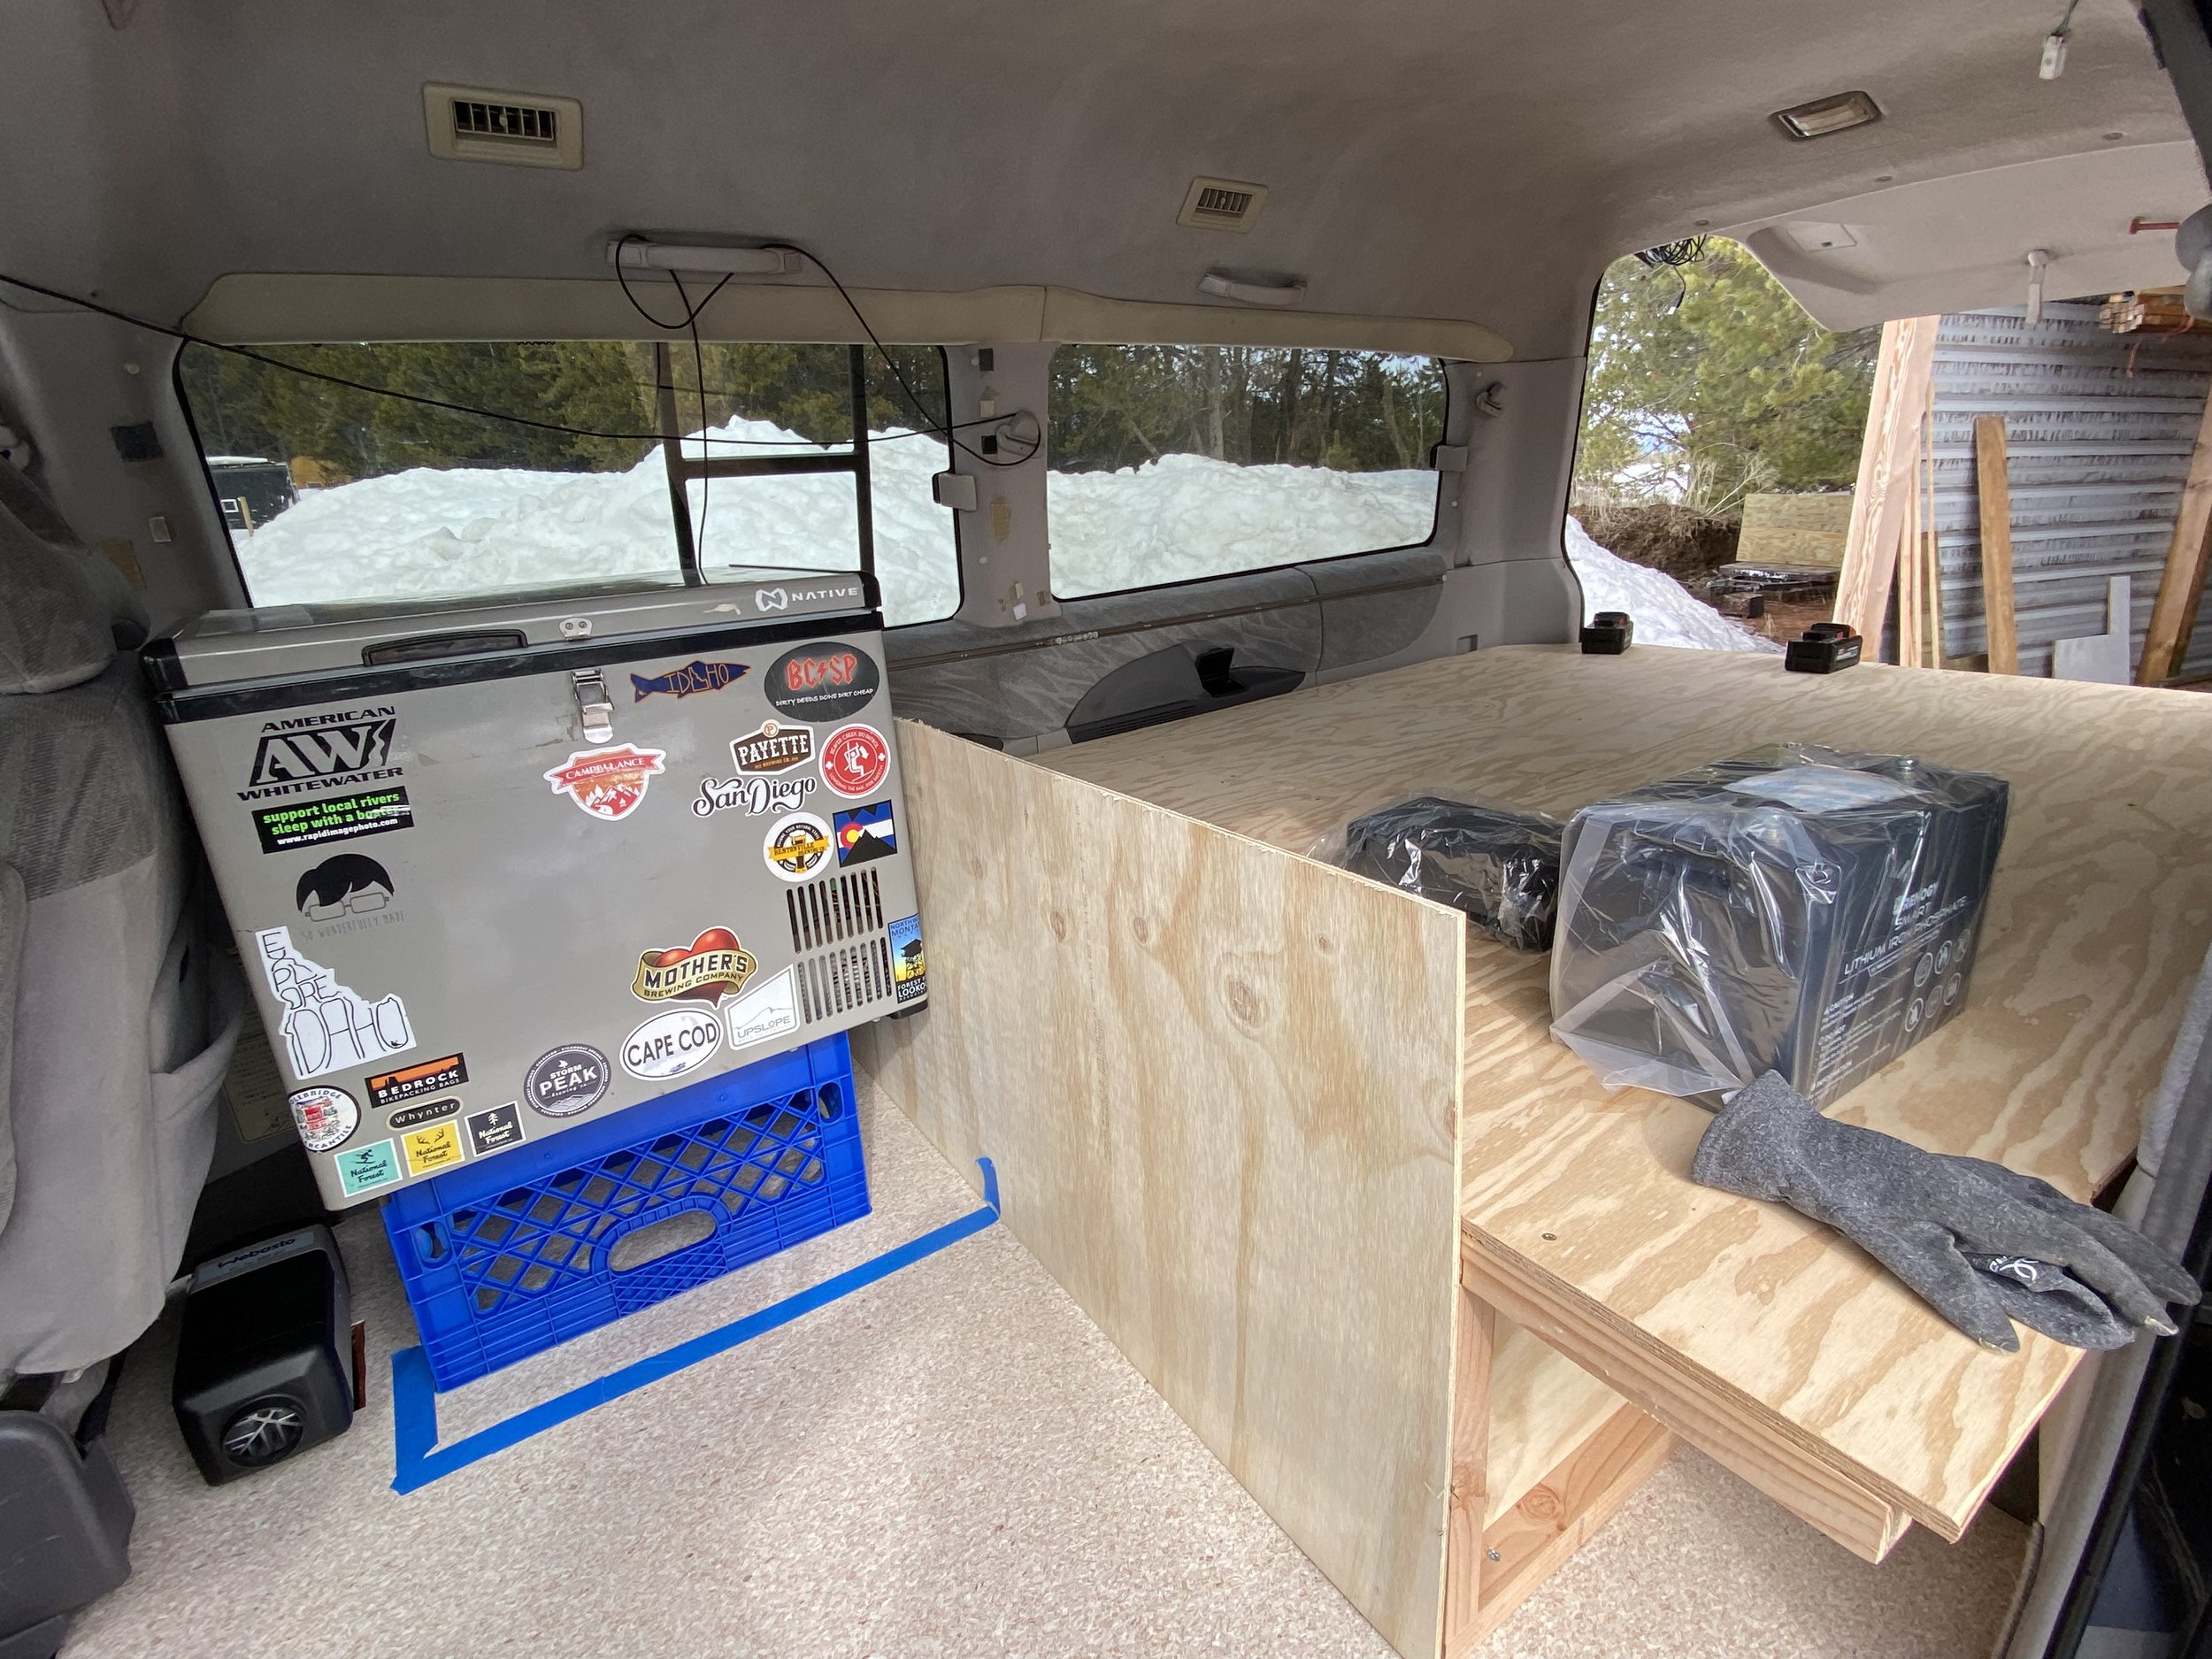
Bed platform finished, and fridge support mocked up.
Testing while Resting.
Packed and Ready for the road!
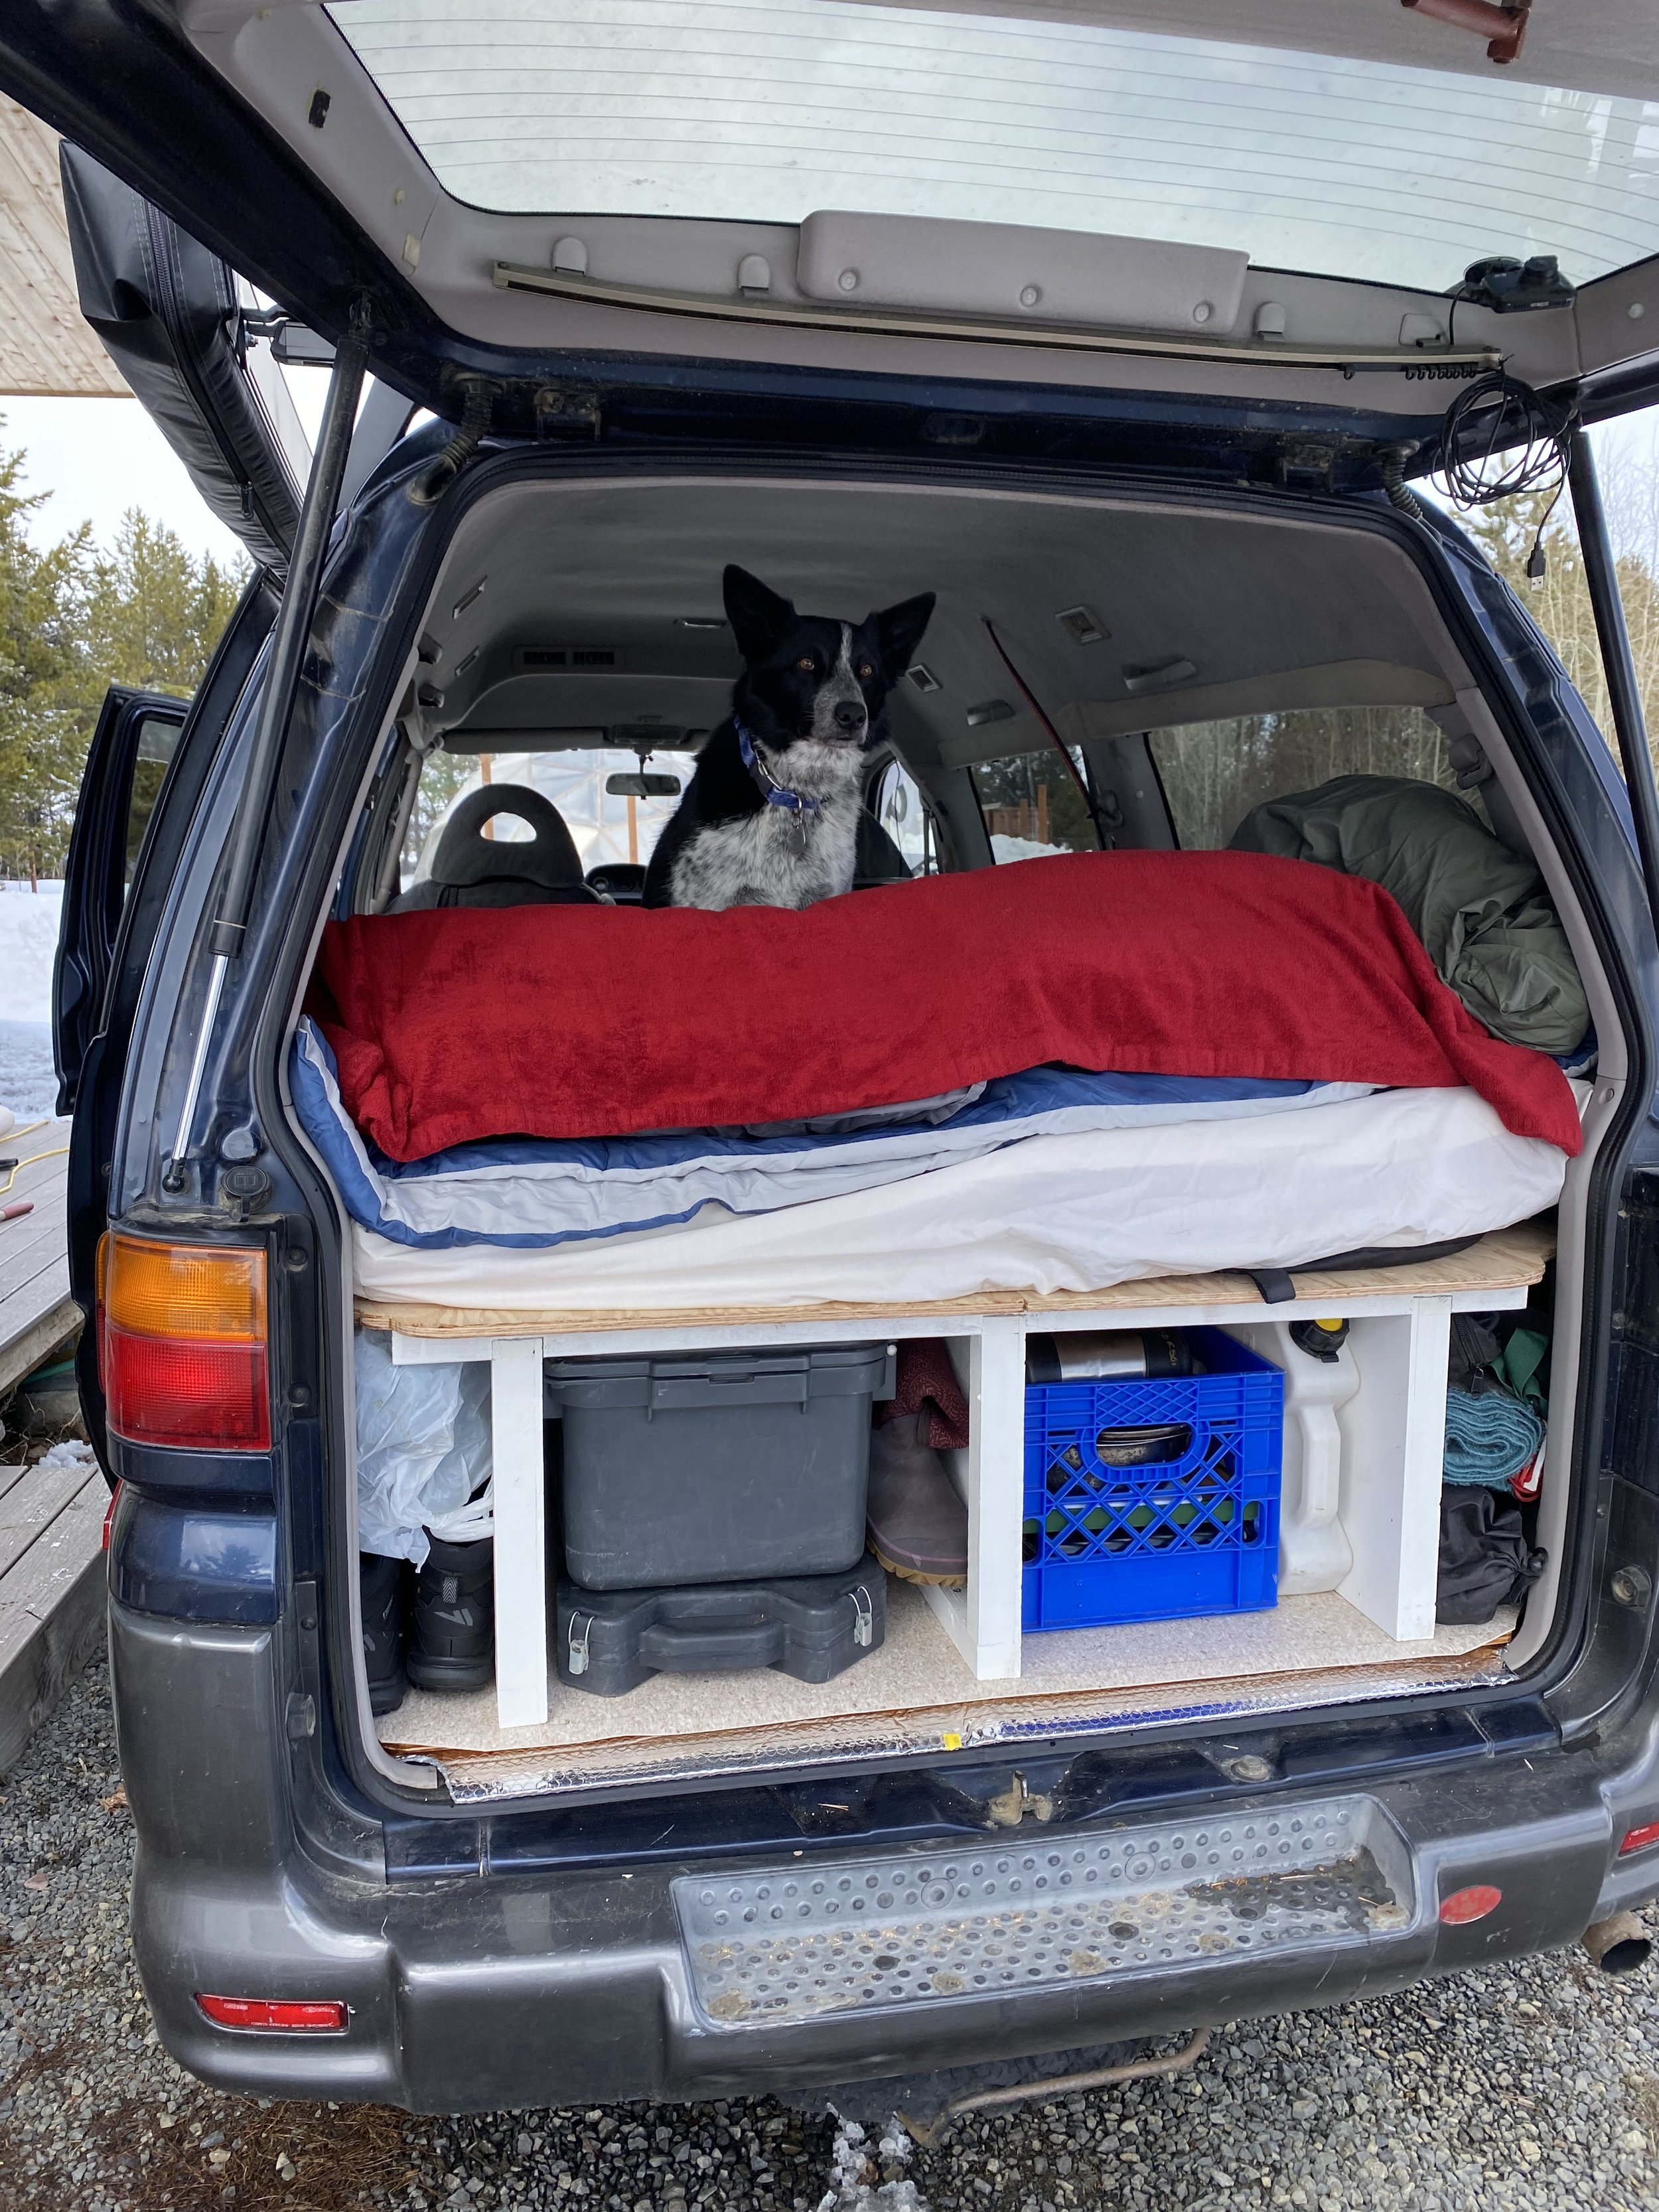
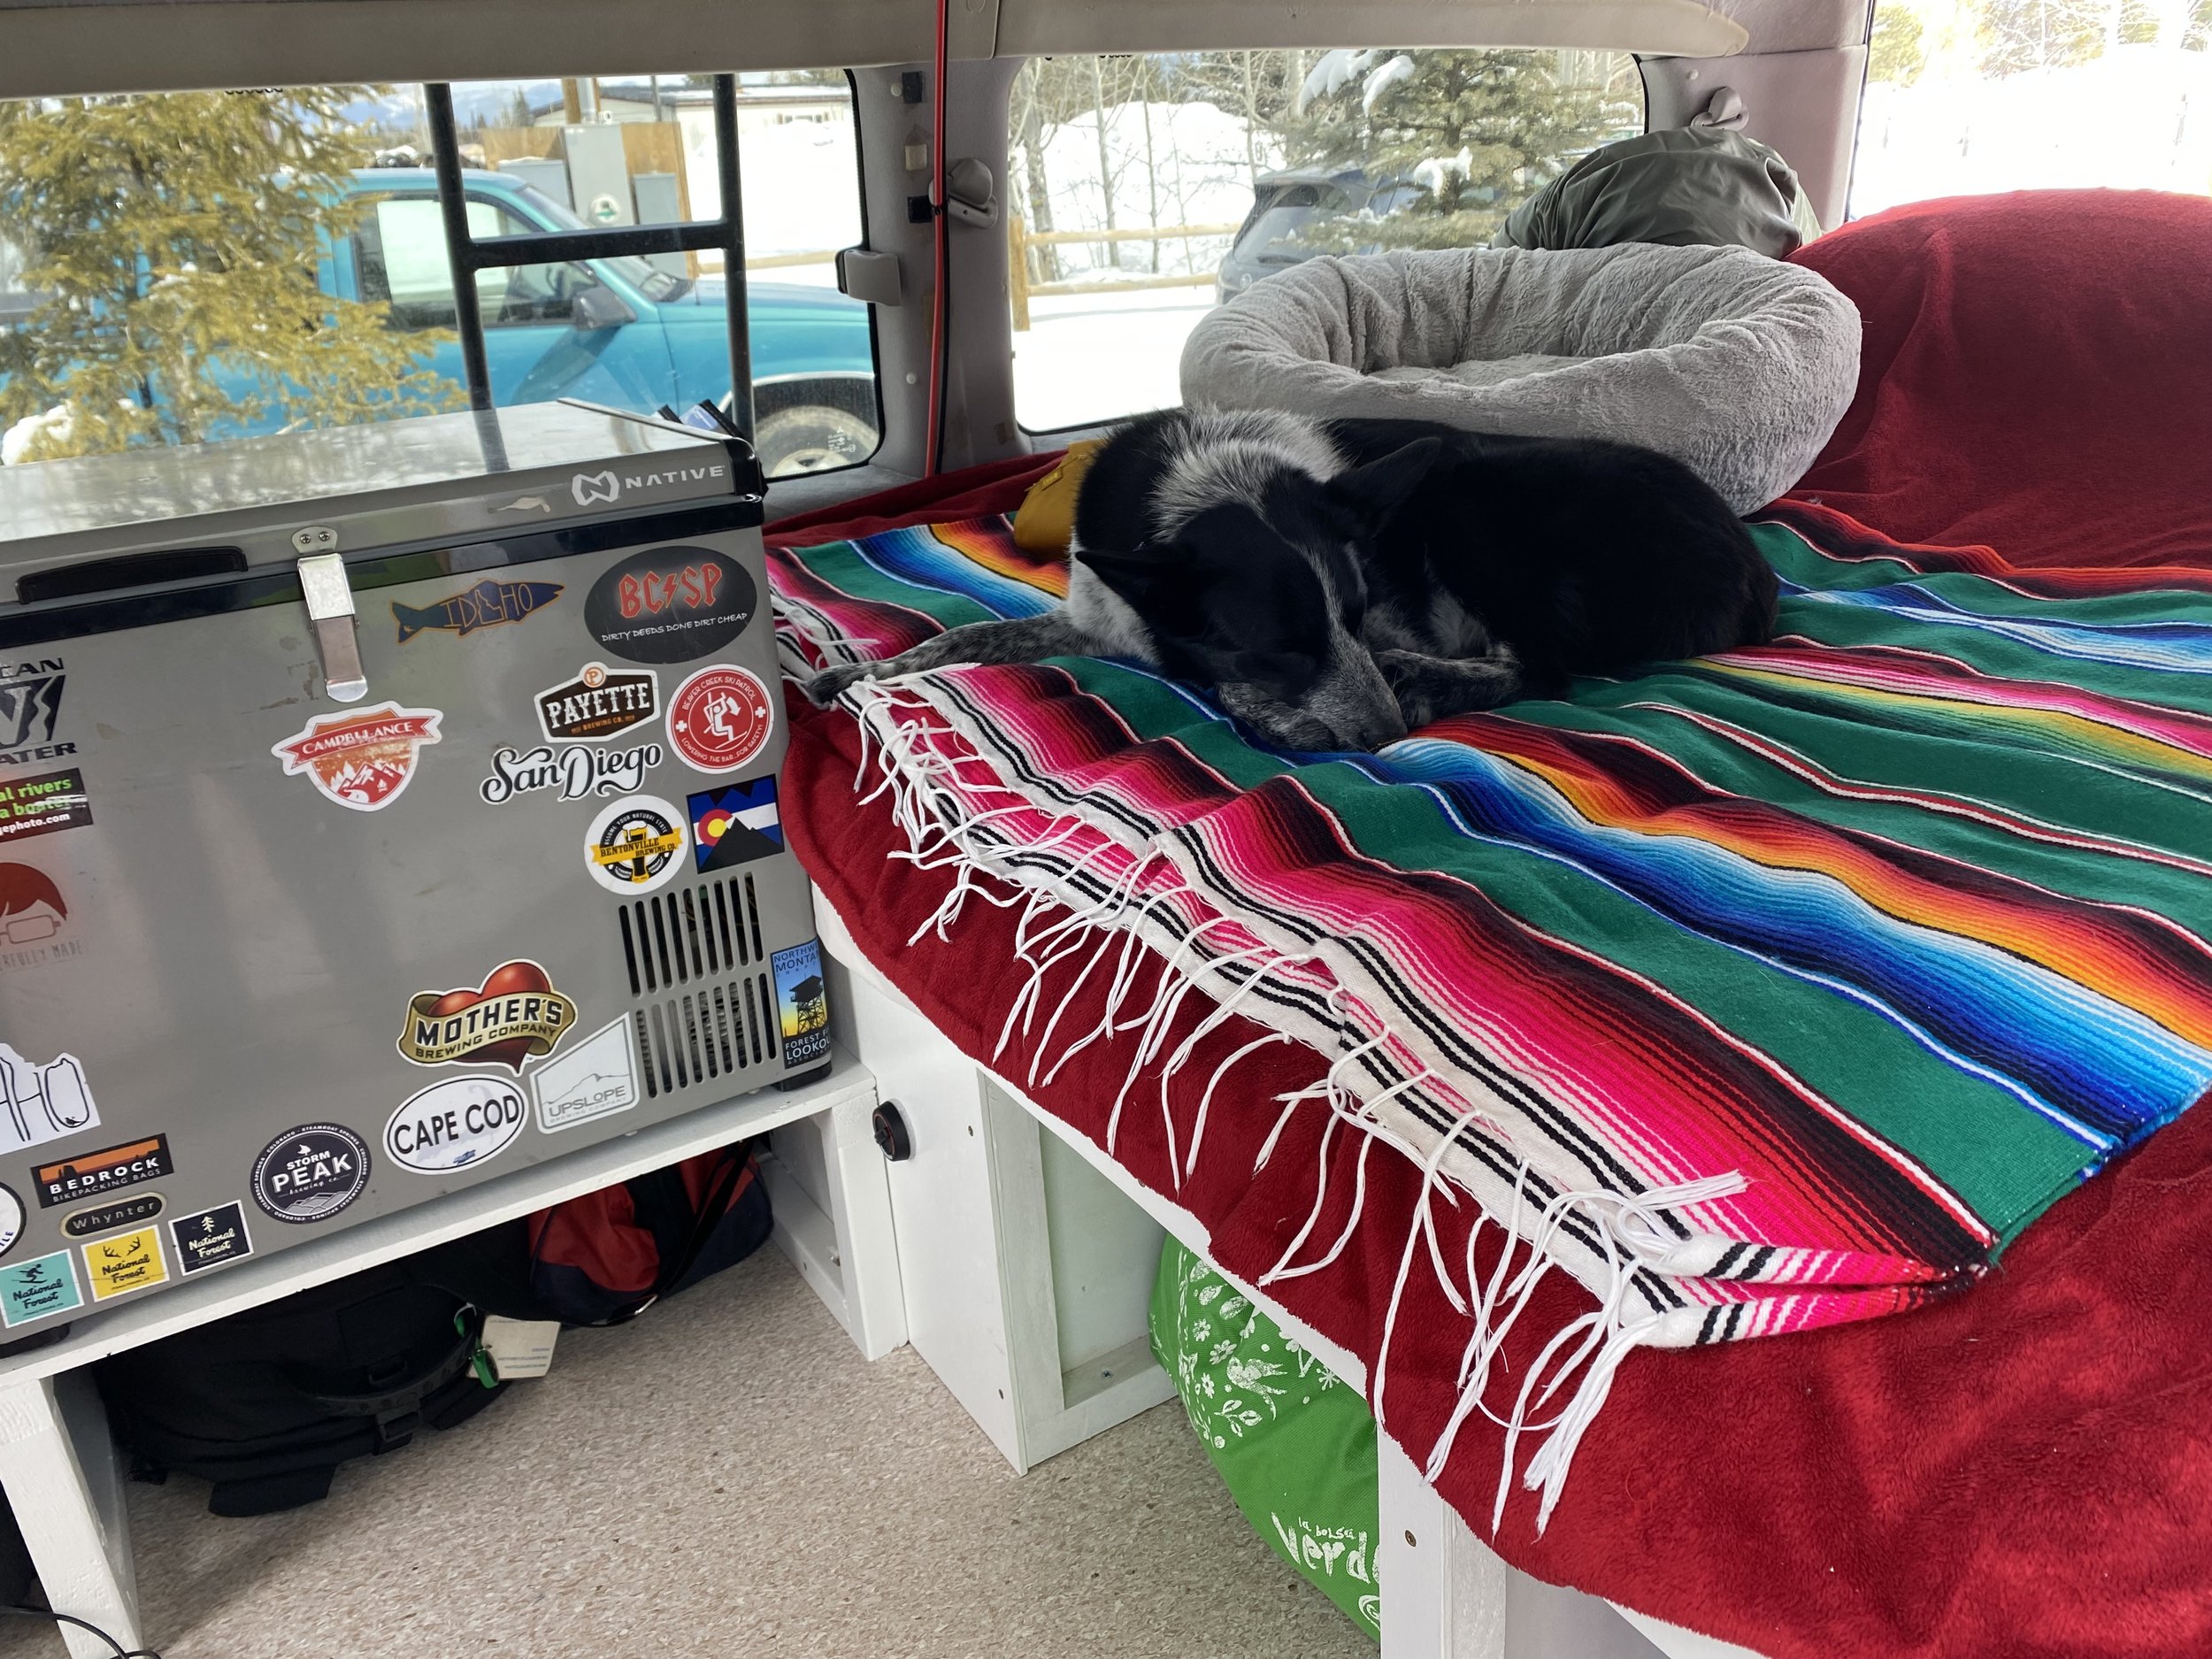
Gracie likes to surveil Her World.

Rolling out to Rendezvan! Don’t worry, that’s Gracie’s Happy face.